Digitip 070 – Adobe InDesign
During the GREP session at the InDesign Conference in Melbourne late August last year, I demoed the “swapping of first name and surnames” and have been meaning to add a tip on this to my blog for sometime in which we GREP it and then sort the names alphabetically. Last night’s visit to the Brisbane IDUG, incidently my first visit to an Australian IDUG, in which Iain presented a great series of short InDesign tips and tricks reminded me 🙂
The pattern
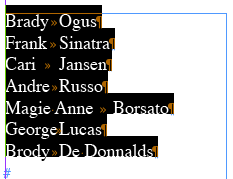
GREP is all about search for patterns in text and applying format or pattern changes to found text. Let’s make the following assumption. A tab-delimited file was placed in InDesign, possibly originating from Excel. Names are listed as: “FirstName <tab> LastName”So how do we find these with use of GREP and swap them around? Well, let’s review the pattern we are looking for: we are looking for “a series of characters” that is followed by a “tab-character” and ends with another “series of characters”. Time to start looking.
Find/Change
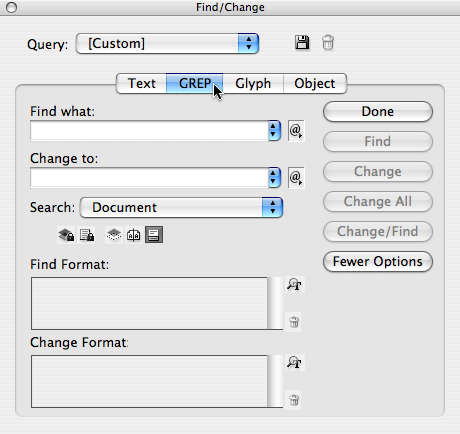
Select Find/Change… from the Edit menu and click the GREP tab. This change the Find/Change dialog to “GREP” mode.
Marking Subexpression
Subexpressions are like smaller ‘sub-parts’ of a Find that can be reused for various purposes. To find the above pattern we’ll use subexpressions. We’ll need at least two subexpressions. One for the “first name” and one for the “surname”. Select Match > Marking Subexpression from the “Find What” Metacharacters menu. Insert two subexpressions.

A marking subexpression is an expression that may be recalled. Non-marking ones can not be recalled.
“()()” is now listed in the “Find What” field.The round brackets encapsulate the subexpressions. Between the two subexpression we are looking for a Tab character. Insert the cursor between the two subexpressions. Next Select Tab from the “Find What” Metacharacter menu.

“()\t()” is now listed in the “Find What” field
Wildcard characters
Within each of the subexpressions you’re now looking for any character that might appear one or more times. As the first name or the surname can contain spaces. Place the cursor between the brackets of the first subexpression and select Wildcards > Any Character from the “Find What” Metacharacters menu. Repeat this for the second subexpression.
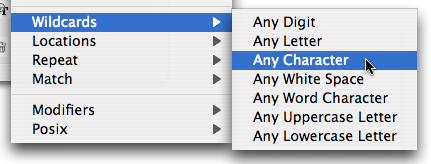
“(.)\t(.)” is now listed in the “Find What” field
One or More times
Your’re not looking for single character first or surnames but for one or more characters.Place the behind the ‘.’ inside the subexpression. Select Repeat > One or More Times from the “Find What” Metacharacters menu. Repeat this for the second subexpression.

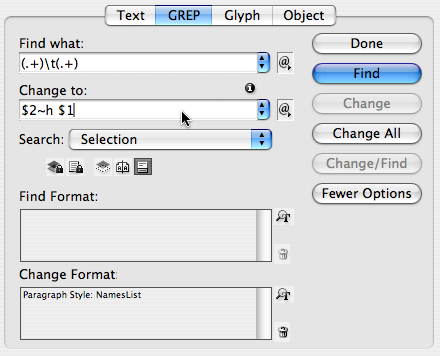
“(.+)\t(.+)” is now listed in the “Find What” field
Change
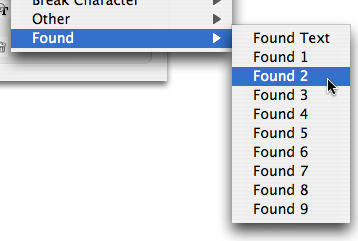
We’re now ready to make the change. When we are finding things we are finding a pattern that contains two subexpressions. In the “Change To” field we want to return the second expression first and the first expression second. Insert your cursor in the “Change To” Field. Select Found > Found 2 from the “Change To” Metacharacter menu to return the second subexpression info first, then Select Found > Found 1.
“$2$1” is now listed in the “Change To” field. I’d like for the Names Listing to be formatted using the NamesList paragraph style. This paragraph style uses a nested style called “Bold” that formats the surname in “Bold”. However as surnames could consist of more than one word we’d need to insert another type of delimiter through which we can set the change for Nested Styles. The End Nested Style Character Here will do the job 🙂 To prep the changed text for this, insert your cursor between the $2 and $1. Select Other > End Nested Style Character Here from the “Change To” Metacharacters menu.

Add a Space behind the ~h to prevent the first and surnames from becoming one word.
“$2~h $1” is now listed in the “Change To” field.
Change Formatting
You’re ready to set the Change Formatting now. Click the Format Settings button next to the Change Formatting to set the Change Format settings.
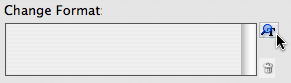
If you don’t see this part of the dialog, click More Options.
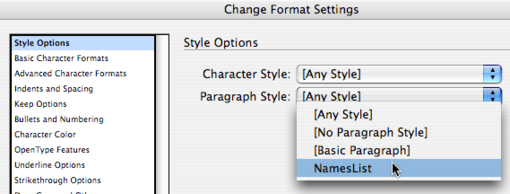
Set the Paragraph style to “NamesList”, click OK.
Making the change
You are now ready to make the change. Select the Names Listing text you’d like to apply the change to. Ensure the Search option is set to “Selection”.
Next press Change All.
Sorting the paragraphs
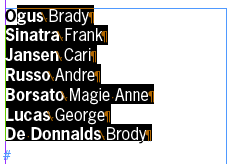
Time to sort the paragraphs now. highlight the names listing again, and Show the Scripts panel (Window > Automation). From the Application/JavaScripts/Sample Script double click “Sort Paragraphs”.
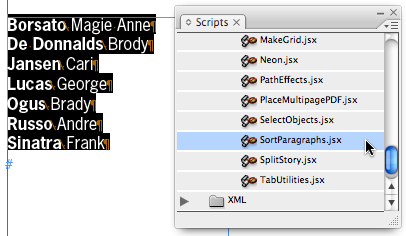
You’re now done. Listing now displays Surname Lastname and is sorted in alphabetical order.
🙂 GREP is a serious time saver!
Thank you! I’m just learning GREP, and this just helped me over a hurdle. Yay for Marking Subexpressions!