Digitip 016 – Adobe InDesign CS
(revision 2)
Once upon a time Adobe created another best seller… For those who have been avoiding the use of styles in various programs and versions, the day has come to review this newest style feature introduced in InDesign cs. It’s smart, it’s easy-to-use, it’s a time-saver and it’s just magical!
Paragraph Styles
Paragraph styles have been around in numerous applications for many years (even in the previous century). They are characterised generally speaking by the fact that they can collect any character formatting and paragraph formaating settings, including tabs, colour, hyphenation, justification, rules, etc. in a paragraph style. This collection of styles can then be applied through placement of your text cursor anywhere in a paragraph.
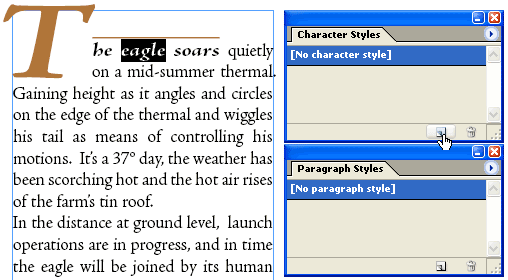
In other words, create a “dummy”-design.
Once you like the formatting of your text, place your cursor in the dummy-text and highlight the bit from which you want to generate a new character style, then click then Alt(Option) click the New Character Style button in the Character Style palette, this will launch the dialogbox, and allow you to enter the style name.
Click OK to apply.
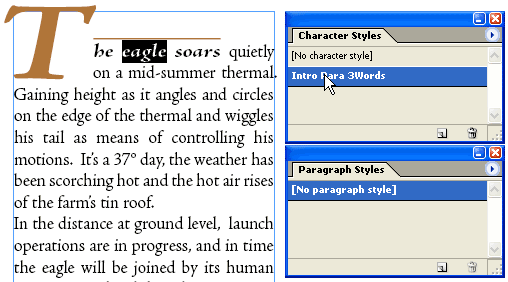
Repeat this process for the second character style and third character style (if you have a third style to create).
Character Styles
To generate a basic character style that can be used for all body text paragraphs, repeat the highlight text/create new style process discussed in the previous section.
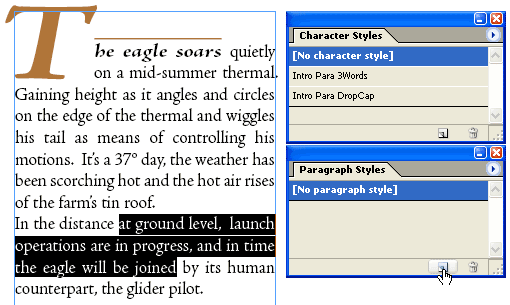
All good an well… Up to this point you can theoretically replicate all steps in InDesign 2… But formatting 186 paragraphs like this would still take a considerable amount of time…
I remember doing stuff like this with ONLY paragraph styles… pressing return key to create temporary paragraphs to which I’d apply parastyles. Then later Character Styles came to the rescue, but if there were Paragraph Rules in use, you’d STILL have to manually adjust the length of the rule depending on the length of the text … (InDesign cs’ new underline features come to the rescue today! and have been assigned in the styles).
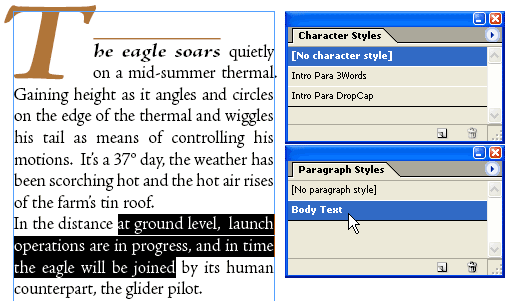
So here comes the really, really, really COOOOOOL stuff…
Nested Styles and Drop caps
With all styles created, create a new Paragraph Style and base this on the Body Text created earlier — that’s handy, as you might change your mind on the body text appearance later, and you’d only have to alter the “parent” style, and all “kids” will be amended automatically —
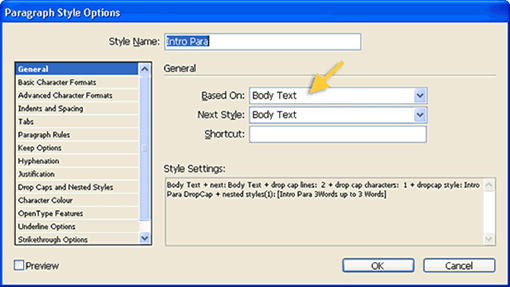
When you are using InDesign cs as an editing tool — using the Story Editor — assign a Next Style as well, to prevent you from having to select the next style manually in case of a style change.
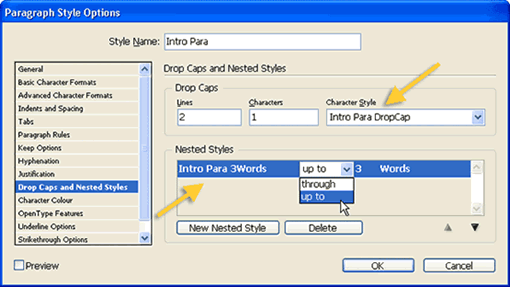
Next click Drop Caps and Nested Styles in the “feature list” and specify the Drop Caps preference as well as the Character Style associated with that. Then select your nested style option: How many words, till what character etc… and click OK to apply the settings.
Let’s perform some MAGIC now…
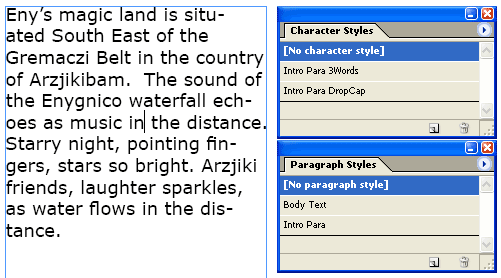
Place your cursor in an unformatted paragraph of your text, then allocate the Paragraph style, containing nesting and drop cap character style referencing and voila…. all is formatted via a simple click of a button…
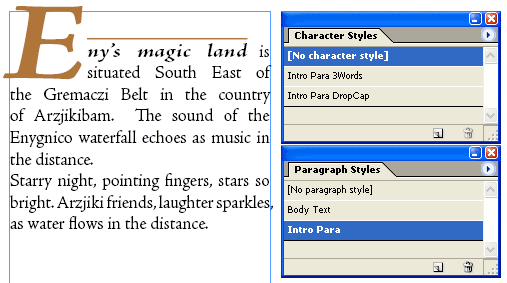
Ok, I know… I’m a “strange” person… but crickey, that’s PRETTY COOL STUFF!!!… when you start playing with the new underline feature in combination with this, you can come up with some pretty crazy lookin’ designs…
My classification of this tip and InDesign feature: PRODUCTIVITY IMPROVER… or in other words BIG TIME SAVER = more time to go shopping, (web)surfing, skydiving, cycling, mini-coopering etc….
NOTE: Apply the newly created styles to your “dummy”-paragraphs, if this text is located in a “live”-document. As these paragraphs will initially not have the new style allocated to it, as you merely used it as a source for style creation.
See also: #047: InDesign CS2 – Nested Styles (9.6Mb movie)
Leave a Reply