During our InDesign Trivia night at the Perth InDesign User Group in December, we had some fun with colours in InDesign.
Updated: 5-Jan-2010: Added Video Tutorial at end of transcript
Here’s one of the scenario’s we used: So you’re working on a layout in InDesign, and although you know you can use the Eyedropper tool to pick up colour from a placed image for use in InDesign, you’ve got the sudden urge to build a series of colour swatches based on the colours found in one of the images used in the layout.
The ingredients
Ok, so let’s have a look at how this works. The ingredients and tools we need are:
- a placed image in Adobe InDesign
- Adobe Illustrator
Getting the colour out of your image
I’m assuming you’ve already placed the image in InDesign. So let’s start by selecting the image that is to be the source of your swatches with the Selection tool.
Next either right-click the image (and choose the contextual menus) or choose Edit > Edit With > Adobe Illustrator CS4.
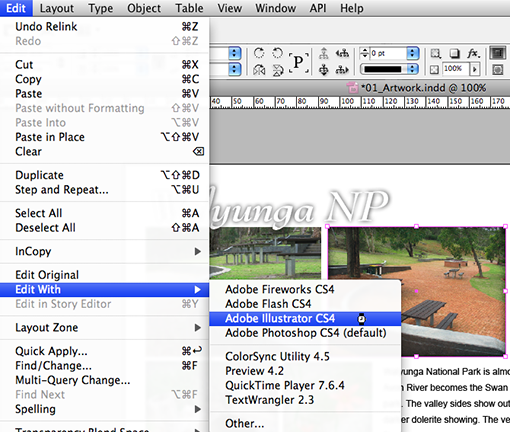
Illustrator???? Hang-on this is a photo, shouldn’t we be opening this in Photoshop? Nope 🙂 Illustrator has a very cool feature called Live Trace, and that’s what we’ll be using in this case to extract our swatches from the image.
The cool thing is that you can now choose in which application you’d like to Edit a placed file. This is something you couldn’t do before CS4.
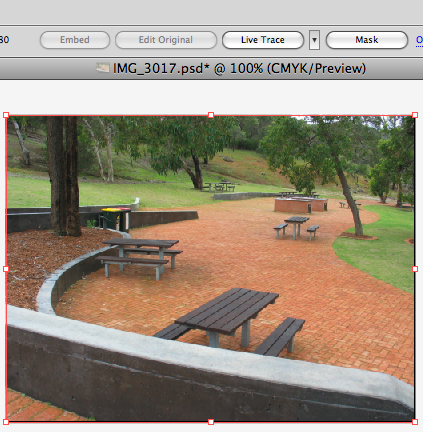
In Illustrator select the image with the Selection tool. As soon as you do that you should spot the Live Trace button in the Control panel at the top.
We could just click this button, however, doing so means that we have no idea of the settings that are being used, so we’re taking a different approach.
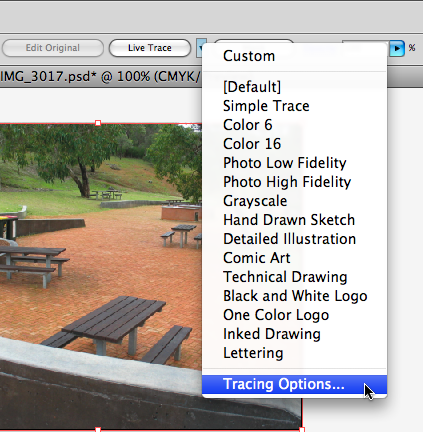
From the drop down menu next to the Live Trace button, choose Tracing Options… This will allow us to determine exactly how many colours we want to extract to swatches.
The Tracing Options dialog appears. Yay! We’re not going to do too much in this dialog. Just a few minor changes in the Adjustments section of the dialog.
Set the Mode to Color. Leave the Palette on Automatic. and choose how many colours you’d like to create by setting the Max Colors option. The most important thing comes next: Enable the Output to Swatches option.
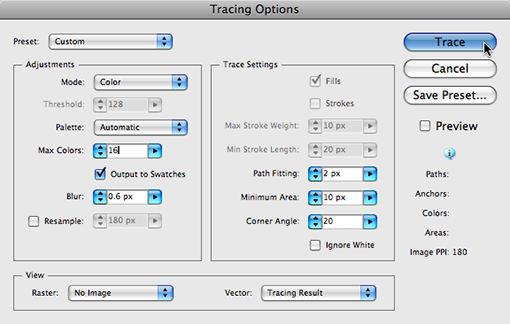
We’re now ready to start extracting those colours.
Click Trace.
Back in Illustrator display the Swatches panel. Notice all those cool colours in it? These have all been created from the original Photoshop file that was opened in Illustrator through the Edit > Edit With option in InDesign.
Now all we need to do is get these colours to InDesign…
Click the first colour in the Swatches panel, then whilst holding down the Shift-key, click the last of the Swatches and from the panel menu choose Save Swatch Library as ASE… (Adobe Swatch Exchange). This Swatch Exchange is a way in which you can share swatches between various Adobe applications.
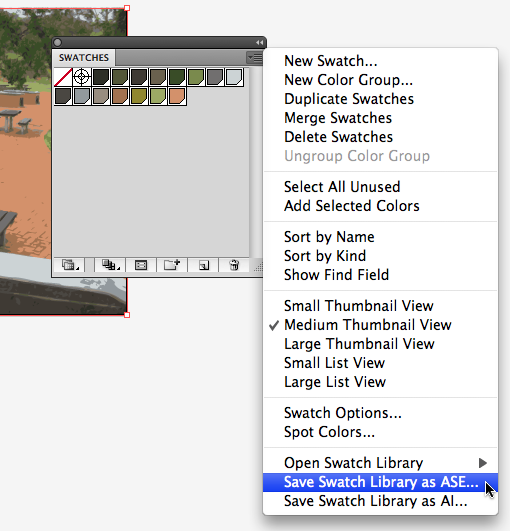
You’ll be prompted for a save location. Save the .ase file in a spot where you can find it later on. An additional Swatch Exchange Alert, will explain that only solid swatches may be exchanged..
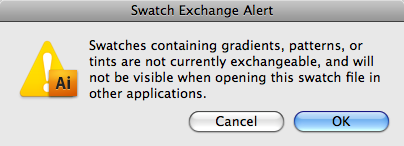
Once you’ve got the .ase file saved, there’s no need for the open Illustrator document anymore. Close it (don’t save) and let’s get back to InDesign.
Back in InDesign
Time to return to InDesign. In InDesign choose Load Swatches from the Swatches panel and navigate to the previously saved .ase, select this file and click Open.
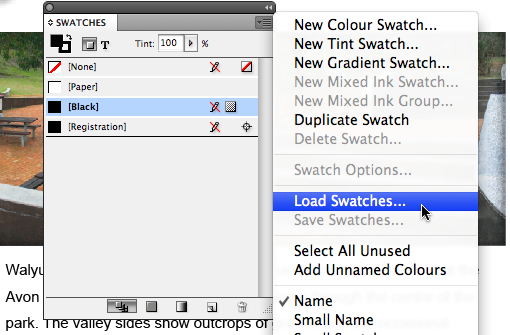
All the Swatches from the .ase file are now added to the Swatches panel in InDesign. Their names however are a little meaningless. You could opt to edit each name manually, however as we’ll be using the swatches as a colour palette it’s probably enough to know the breakdown in C-M-Y-K.
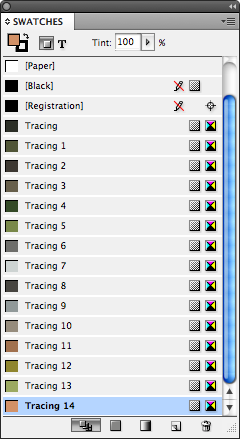
Select the first of the swatches, then whilst holding down the Shift key (same as previously in Illustrator), click the last swatch to select all Tracing swatches, and from the Swatches panel menu choose Swatch Options…
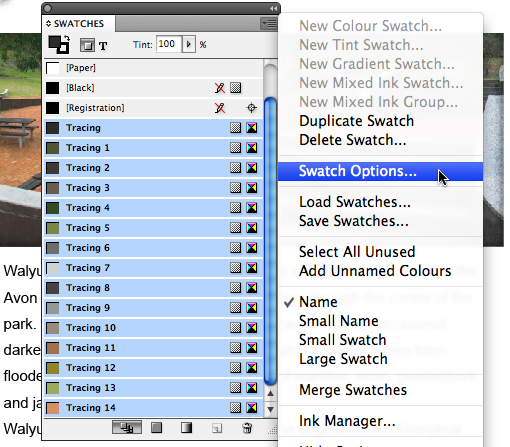
The Swatch Options dialog appears. To give the swatches a slightly more meaningful name, enable the Name with Colour Value option.
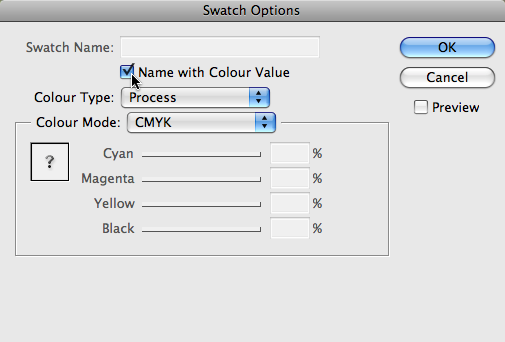
Click OK, to accept this change and return to the InDesign document.
You’re now ready to go wild with colours in InDesign. Enjoy!
Video tutorial
Sorry for the crackling noise… my headphone makes noises when I move my head!!! and the fan of my computer is running non-stop, as it’s too hot in my office… (summer here and 32C inside)…
hi Jean-Claude.
That’s a great one too! Love it! Thanks for sharing! 🙂
Cheers,
Cari
Love your “tut tut tut” on the video when you were waiting for Live Trace to perform. 😉
Another tips is to create an object mosaic from the images in Illustrator instead of using the live trace command. So select your image, choose Object > Create Object Mosaic… and enter the number of tiles you want each will correspond to a color. Then select the tiles and in the Swatch Panel option choose Add Selected Colors. A bit less accurate than Live Trace, but a lot faster.
love this tip – such a great idea!