Fan of creative technology, elearning, instructional design and a little geeky

Photoshop: Creating and duplicating Vector Smart Objects

This is part 1 in a 3 part tutorial on Vector Smart Objects.

An Illustrator file as a smart object

Illustrator files that you have created can be added to Photoshop as Vector Smart Objects. The Illustrator art is nested inside its own layer in Photoshop when the smart object is created.

Creating the object

To create a Vector Smart Object, either copy and paste art from Illustrator, or use – as I’m doing here – use the File > Place command.

Place PDF dialog box

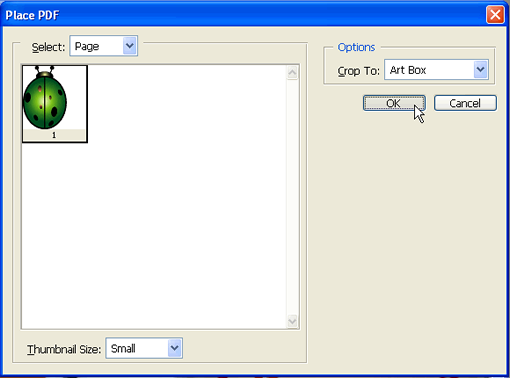
Navigate to your Illustrator file, then click Place and in the Place PDF dialog box, se the Options “Crop To” setting to Art Box, then click OK.

rotating scaling

Your Illustrator art is now placed in Photoshop.

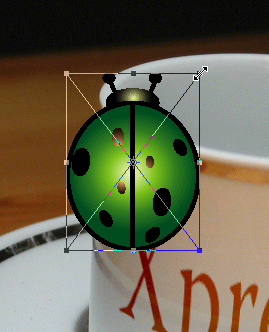
A transform bounding box appears around your artwork, that behaves a bit like Edit > Free Transform. Shift-dragging one of the corner handles will scale and moving the cursor outside the corner handles enables rotation.

moving

And moving the cursor outside the corner handles enables rotation. Press the Enter or Return or return key on the keyboard to apply these settings.

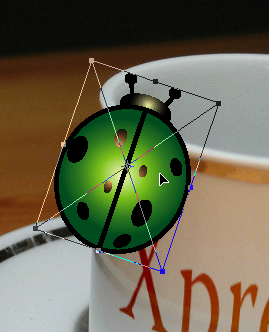
With the Move Tool selected I can further position this newly created layer, which indeed is a Smart Object layer.

auto select layer

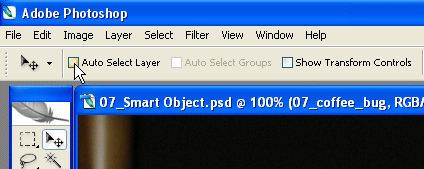
I’m enabling Auto Select Layer as my move tool options, so I can automatically select my bug layer.

show transform controls

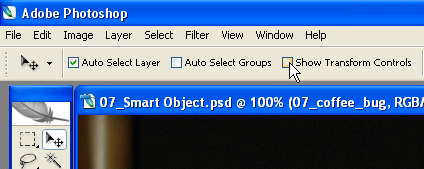
In addition I will enable the Show Transform controls option which allows me to easily apply transformations to selected layers without having to access the Free Transform command.

screenshot

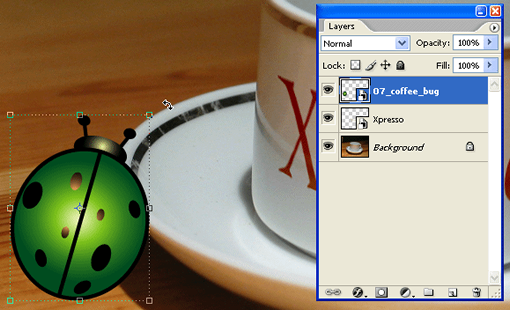
Clicking the bug, now displays the transform controls and automatically selects the appropriate layer in the layers palette.

auto select layer text

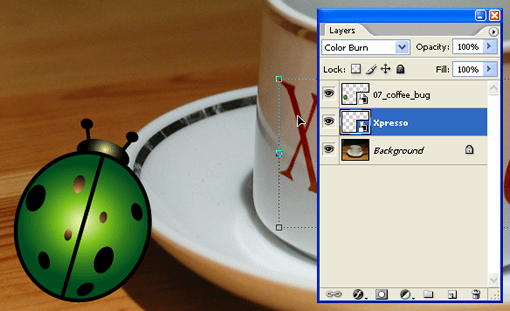
Clicking the text “Xpresso” automatically selects the Xpresso layer. B.t.w this word is by no means associated to “that other page layout applications” 🙂

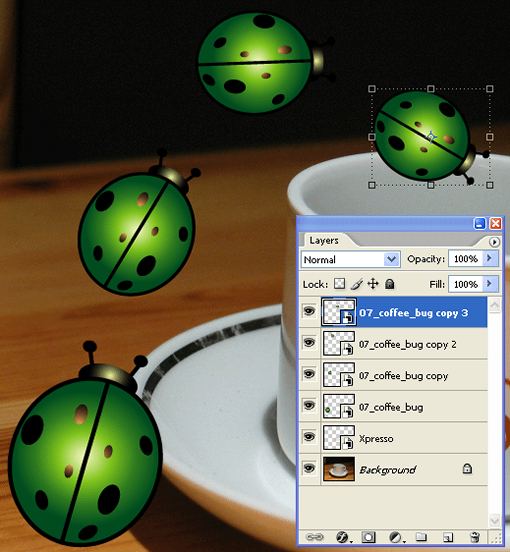
With both these settings enabled I can now use my Alt or Option key to drag a number of coffee bug copies on my graphic and at the same time scale, rotate them as I am creating the copies.

screenshot

And yes, the graphic is no literally littered with coffe bugs 🙂

end product

Continued: Part 2 of Tutorial

Video Tutorial


Similar posts
  • Fixing up old photos with Adobe Photoshop As part of the April 2015 Adobe User Group meeting in Perth, I recorded a series of videos that covered some of the tips we reviewed during that meeting. For a full read-up about this meeting, please visit the Rejuvenating old photos and documents meeting round-up page. Video 1: Converting an old sepia tone back [...]
  • How to remove a background from an image in Photosho... How do I remove a background from an image? The following Photoshop tutorial (youtube video) shows one of many techniques there are for removing image backgrounds. The technique used doesn’t permanently remove the background pixels in the images, but allows you to further correct and fine-tune the transparent background you create through the use of [...]
  • Channels, Masks and Adjustment Layers… Channels, Masks, Adjustment Layers… Photoshop CS5 rocks when it comes to using these features in conjunction with each other. Did you know you could use color channel information in Photoshop as the basis for a mask, that will control where a particular color adjustment might be applied? All without harming any pixels whatsoever in the original image? [...]
  • Removing power lines from a photo with Photoshop Photoshop CS5 introduces us to a very cool new tool, the Content-Aware Spot Healing Brush Tool a true power  tool, that has many different uses. You can use it to get rid of blemishes in an image, such as spot in a persons face, clean-up rubbish or loose leaves that might lay on a lawn in [...]
  • How to fix horizons that are on an angle in Photosho... We've all got them... those holiday shots where the ocean seems to be running of the edge of the image, where the horizon is no longer horizontal. With Photoshop CS5 we can straighten out those images faster then ever before. In the following video let's take a look at how we can use the Crop tool, Ruler tool, Arbitrary rotation, [...]

Leave a Reply

Your email address will not be published. Required fields are marked *