Digitip 063 – Adobe Photoshop CS3
A month or so ago I demoed a masking technique that works well with text in Illustrator during an Adobe eSeminar I delivered. At the time I promised to write this technique up as a digitip, however, an extremely busy workschedule meant I’d not yet gotten around to posting the tip. But a promise is a promise. To make up for the delay in posting this tip, I’ve spruced up the tip with Adobe Photoshop CS3 artwork creation, and that’s where I’ll start Part 1 of this three-part tip.

There are many different ways of achieving this end result, some much quicker than my tip, purely using Photoshop or Illustrator. The tips uses Photoshop’s Filter Gallery, Illustrator’s Live Trace, Colour Groups and Opacity Masks… and will show you how you can still edit each of those components at the end…
Part 2 of the tip will take the Photoshop artwork we’re creating here into Illustrator and trace it, and Part 3 will create the Text Effect.
Creating the trace graphic
We’re starting in Photoshop CS3 and are creating a new graphic. As I’m imagining this might become a header of some sort, I’ll stick to A4-width and about 8cm height. (File > New).
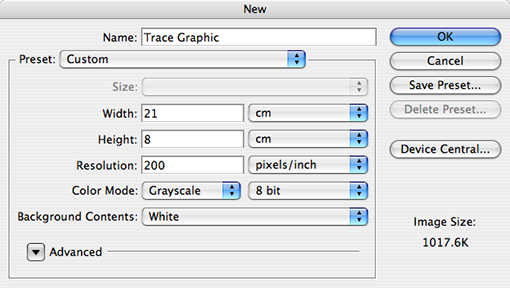
Because I want to limit the colour effects for the final result I’m restricting myself to creating a greyscale image.
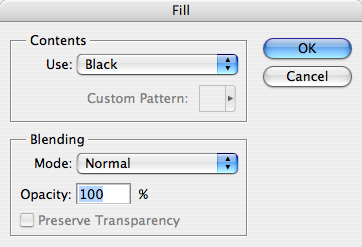
Fill the image with 100% Black (Edit > Fill). I want to be able to edit the Filter settings after initially applying them. In order to do this the Background must be converted to a Smart Filter Layer. Select Filter > Convert for Smart Filters.
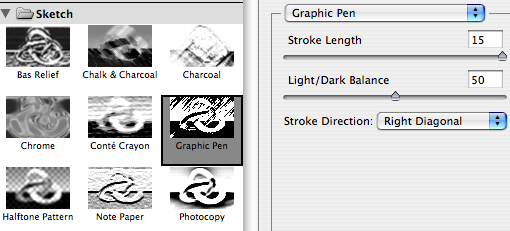
With the use of a few filters the scattered look is generated. Select Filter > Filter Gallery and expand the Sketch filters and click Graphic Pen.

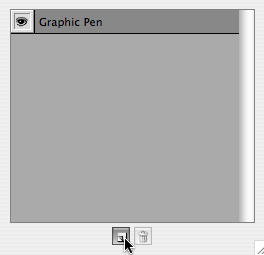
 A diagonal pattern appears. Let’s stick to the default settings for now. We’re going to add apply another Filter. Click the New Effect Layer icon .
Question for Adobe: why is this caled a New “Effect” Layer and not a “Filter”Layer?
Two Graphic Pen Effect Layers appear in the Filter Gallery dialog.
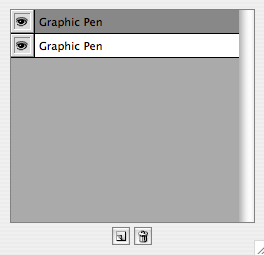
The top one is the newly created one. With this Layer still selected, expand the Brush Strokes Filters and click Accented Edges.

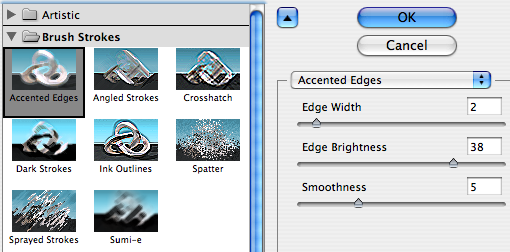
Click OK.
Now let’s look at the Layers panel. It displays our Smart Filter layer, and in addition shows us the Filter Gallery that’s been applied to the image.
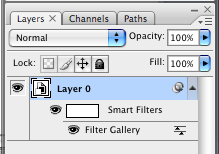
To further edit the two Filter Gallery effects or add additional Effect Layers, double click Filter Gallery.
The previous dialog appears again, and you can make changes to the settings for the two Effects Layers. I’m pretty happy with my default result at this stage, so will leave things as they are.
Time to save the image and bring it into Illustrator…
I’m saving as a Photoshop file with Layers in tact.
Part 2 of this tip will bring the graphic into Illustrator…
Leave a Reply