Digitip 038 – Adobe Illustrator CS2
Ok, this one ‘bleeped’ at the CS Conference, Quick Tips session in Sydney for some mysterious reason (gremlins, probably…) but here are the notes on how to create 3D blending shockwave movie from Illustrator CS, using the new CS2 Isolate Selected Group feature.
Creating shapes and blend
For the purpose of this tip I am keeping things simple. Starting by creating and filling a circle with a solid colour, then Alt (Option)-dragging a copy to another spot on the page. Give your second object a different colour.
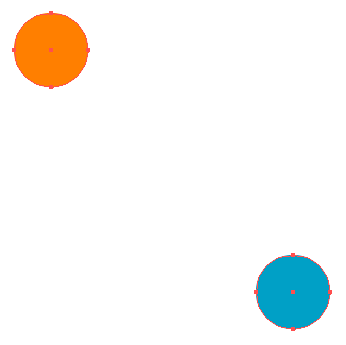
Next select both objects with the selection tool so you can see their anchor points (selecting is not actually necessary by the way).
![]()
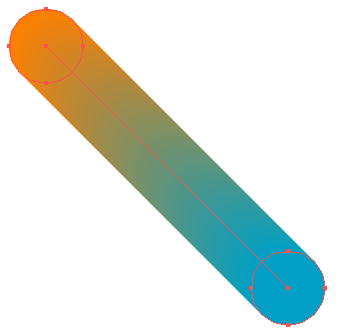
Blend tool (left), smooth blend between circles (right).
Select the blend tool from the tools palette, then click the top anchor point on the first circle and the top anchor point on the second circle. The blend that appears between your objects will vary depending on your default blend options settings.
Select the blend with the selection tool and access the blend options from the Object > Blends fly-out menu.
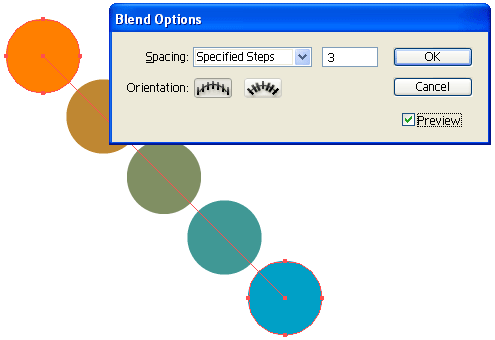
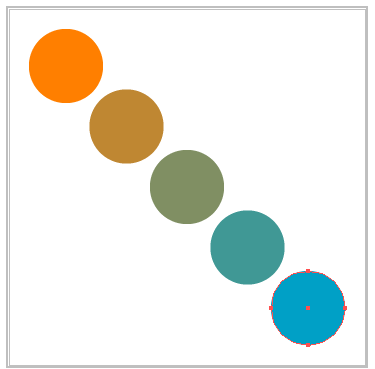
Now chane the Spacing setting to Specified Steps and depending on what you have in mind for your animation enter a number of steps. Remember that each blend object is going to be a frame in your animation. I’m selecting ‘3’, again to keep it simple 🙂
Now double click your blend to isolate the group (yep, that’s what that grey box around your artwork is for…) — Don’t ask me why in the Control Palette fly-out it is referred to as Focus Mode though 😉
Creating the effects
Now let’s start creating some magic… With your selection tool still in hand… select the bottom circle and from the Effects menu select Distort & Transform > Zig Zag.
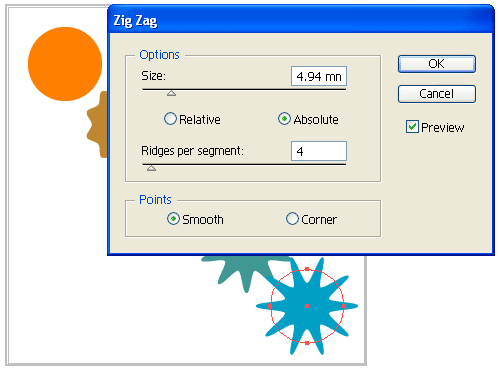
Depending on your preference change the shape of the circle to a smooth looking star, by playing with your size and ridges settings. Click OK to accept your settings.

Now, click the top circle. And apply a 3D > Extrude & Bevel Effect (Effects menu) to your circle. You should see the first bit of magic now 🙂 Click OK to accept your settings (In my example I’ve not edited the settings at all and stuck with the defaults).
Now select the bottome circle/star (technically speaking it is still a circle, as the star was only created using an effect).
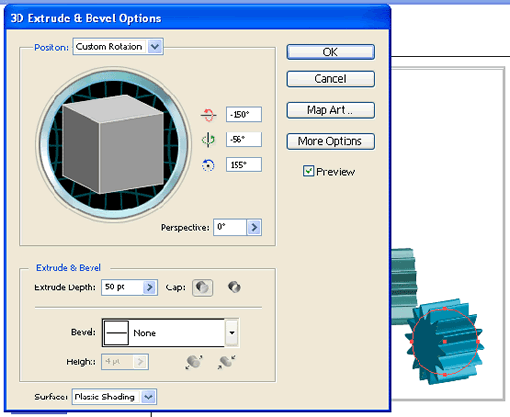
Again access the 3D Extrude & Bevel effect, this time make a rotation around one of the 3 axis (I opted for the gree /vertical axis). You can also drag the ‘cube’ preview by the side to generate the rotation. Click OK to accept your settings.
Next, double click outside ‘off’ your artwork. This takes you back to your group. The grey box around your artwork should disappear… Now select your artwork, and from the Object > Blend menu select Extract. This generates a group consisting of individual 3D objects… (nice right!!!)
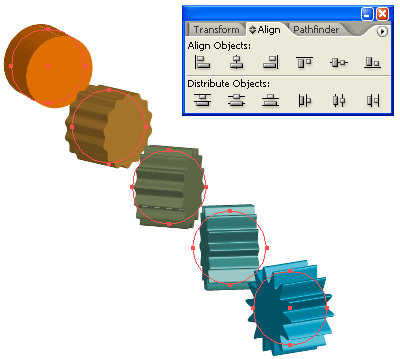
Ok, we’re not done yet. You must ungroup the group (Object > Ungroup), then select all group elements and using your Align palette, verticallly and horizontally centre your objects. As a result the will all be stacked on top of eachother.
Working those layers
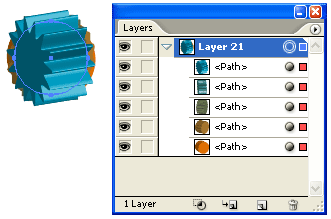
Now go to your Layers palette and target the layer you’ve created (by clicking the ciircle icon to the right of the Layer name).
From the Layers palette fly-out menu select Release to Layers (sequence).
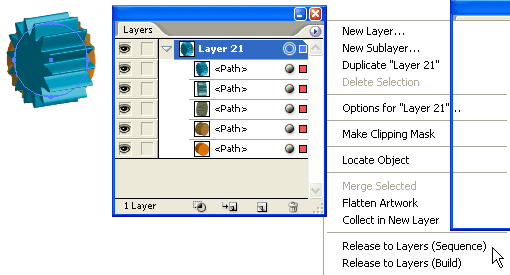
As a result all individual 3D shapes are assigned to layer (in sequence).
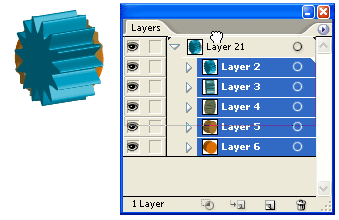
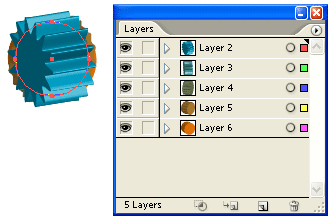
Next, shift click Layer 2 to 6 to select them and start dragging, till you can drop them just above Layer ’21’ (in your case that will probably be Layer 1…) Once the drop is completed, delete the layer from which you pulled the Layer 2-6 layers. (i.e. Layer 1). You should now only see your 3D objects in individual layers.
Animation
You are now ready to create your shockwave animation. From the File > Export menu select .SWF as your preferred output format. The Macromedia (soon to be Adobe) Flash Format Options dialog box will appear.
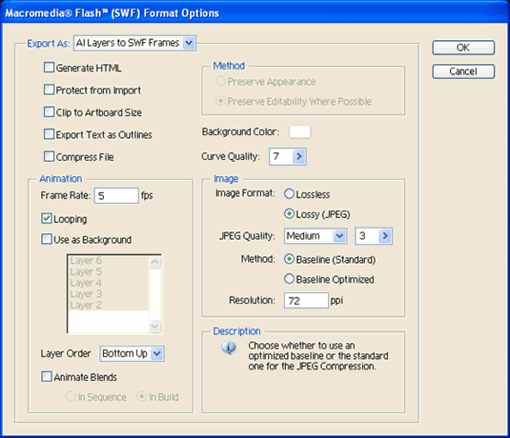
Export As: AI (Adobe Illustrator) Layers to SWF frames. Set your animation options (frame rate, looping etc.), and your image format. and click OK. Your .swf will now be created.
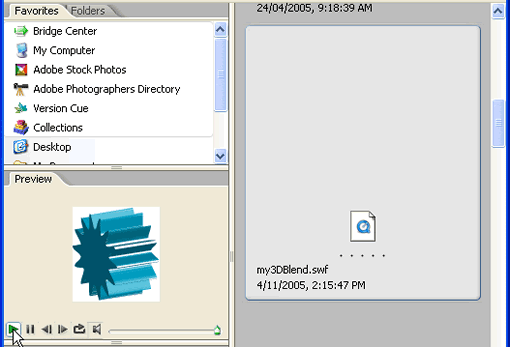
If you change the file association for .SWF in your system to Quicktime Player, you can play your Shockwave movie within Adobe Bridge 🙂 or else using QT Player, or open the file in your web browser.
Pertty cool right? 🙂
Now remember, this is only a simple example… try making things a little bit more difficult 🙂 and you can see some real morphing happening 🙂
Have fun!
No Pings Yet