Digitip 032 – Adobe Illustrator CS
Just remembering how as kids we used to paint Easter eggs, using coloured die. When leaving the eggs in the die too long, your egg-white would turn green, purple or any other colour we might be painting. Today I prefer the chocolate Easter egg variety over the hard boiled eggs. And after overeating these, I’ll have to resort to the digital variety made in Illustrator.
So this tips looks at using the 3D Revolve and map art effects for creation of digital Easter eggs.
Pattern first
To commence, start by creating a continuous pattern in Illustrator. The thought behind such a pattern is think “symmetry”… I’m using simple stars placed on a square, using the “Show Center” option in the Attributes’ palette to align the 4 stars to the corners.
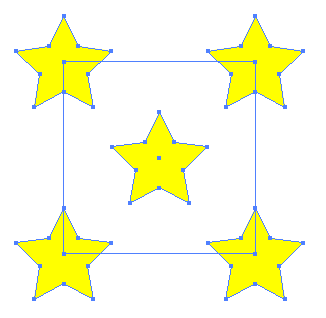
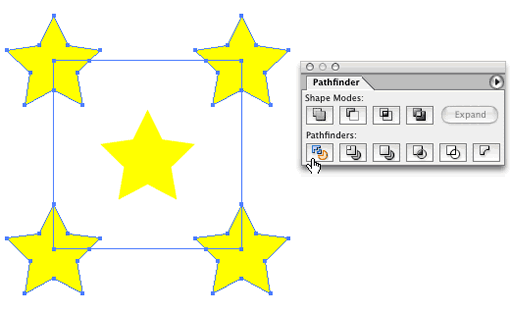
Then divide the shapes by selecting all four corner stars and selecting the underlaying square shape, and click the “Divide” option in the Pathfinder Palette.
Note: for non symmetrical pattern objects, you can generate a continuous pattern, by drawing your objects over a single pattern shape and then repeating this shape as if you were doing a tiling job in your bathroom, then remove overlapping pattern sections)
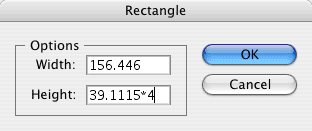
I’m writing down the exact width/height of my pattern : 39.1115mm in my case. The reason for this will be clear a bit later (you can find the width / height measurements, in the transform palette).
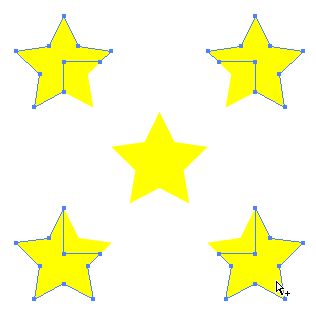
After this shift click the corner elements falling outside the pattern square using the group selection tool and delete these.
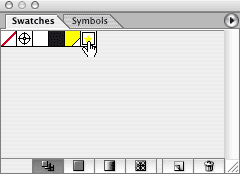
My pattern is now ready and can be dragged to the Swatches palette and named by double clicking the swatch (or select Edit > Define Pattern).
Symbol next
The next step is to generate a symbol that will function as the ‘egg wrapper’ that will cover your three dimensional egg.
Create a rectangle that is filled with the pattern, that is about 4 or 5 times the shape width and height. No need to use a calculator. Illustrator will do that for you. Click with the rectangle tool in your artboard and enter the width then height of your pattern (in my case 39.1115mm) and next add ‘*4’ behind the numbers (to multiply).
Now click OK to apply and fill your rectangle with the pattern you added to you swatches earlier.
The reason for this precise ‘egg wrapper’ creation is to enable cylindrical wrapping where the patterns overlap seamlessly when joining ends.
Then fill the shape with the pattern you’ve created.
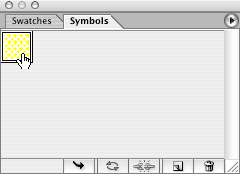
This ‘egg wrapper’ is going to be your symbol that is used to by the 3D Revolve Effect as art to be mapped around the egg. Drag and drop it to the Symbols palette to create the symbol.
Drawing the egg
Start by creating an elliptical shape and move select the top anchor point using the direct selection tool and move it upward (click drag a marquee around the anchor point to select it).

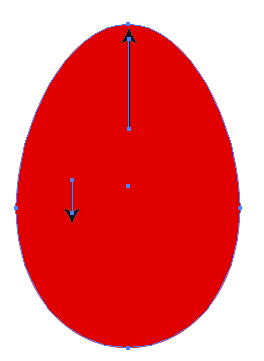
Then select the two anchor points on left and right hand side of the egg shape and move these down a bit (use the arrow keys on the keyboard to ‘nudge’ them down).
Once this is completed, select the anchor point on the right and press delete. You’re now looking at half an egg. You are ready to make your Easter egg now.
3D Revolve
Select the half egg and Effects > 3D > Revolve and set your Revolve settings.
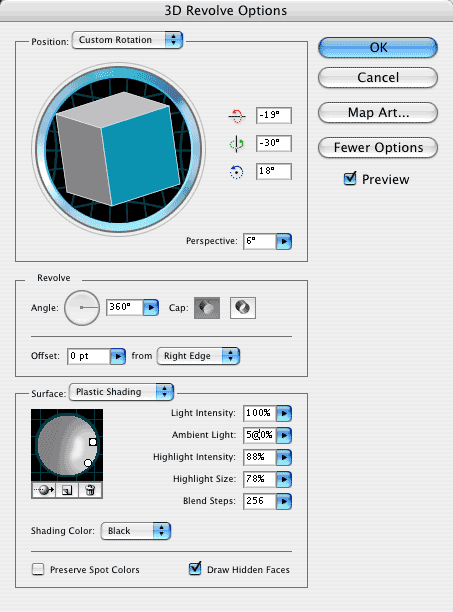
For the surface settings I’ve added an extra highlight point, and amended the plastic shading sections as well as rotated the egg a bit. The Revolve settings are kept basic, with just a change to the rotation axis from left to right edge (the axis around which your shape is revolving to create the 3D appearance).
Click the Map Art button and select the star egg wrapper symbol created earlier as the surface wrapper.
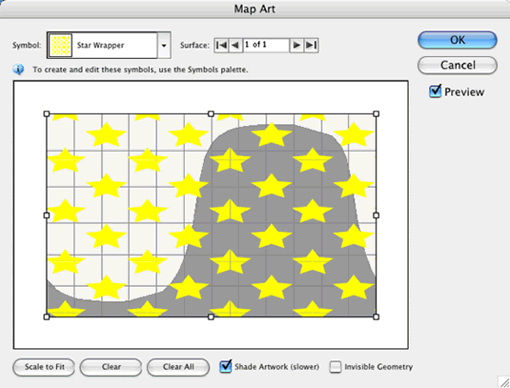
Size the wrapper to be a perfect fit on the surface area you’ve selected. Click OK and you’re egg is ready!

The 3D stuff just remains amazing!!! 🙂
Leave a Reply