Digitip 008 – Adobe Photoshop 7
Building on Nick Hodge’s spot colour Photoshop / InDesign tips I thought it would be nice to show a way of creating a simple cartoon, using one(spot)colour and black in Photoshop. It includes using a layer effect to spice-up the look a bit and calculations to extract the different colour channels to new documents which can then be used in InDesign (as in Nick’s tip).
The black outline
For the artist: Create a new CMYK document with a white background, and set the foreground colour to 100% Black (set other colours to 0%) . Then using the brushtools create the cartoon drawing.
When hardcopy artwork supplied: scan in as greyscale and copy content to black channel of a CMYK document with identical image size settings.
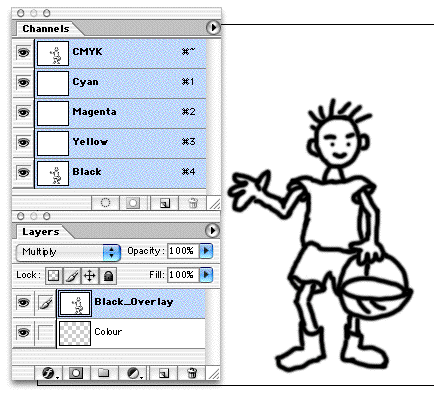
Separate this Black overlay in a layer, with the blending mode set to Multiply.
Add colour
Check the channels palette to assure that only the Black channel contains “content”. Then create a second layer in which you add the cartoon colour. Pick either Cyan or Magenta as foreground colour.
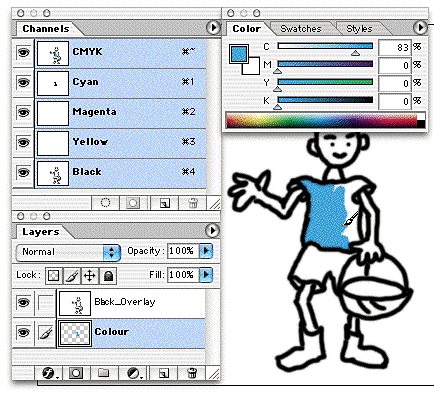
NOTE: you can not work in layers if you are trying to work in Multichannel mode using spot colour channels. This makes the creation of the cartoon more cumbersome and is the reason I choose to use the old “work in CMYK mode” trick.
Spicing up the colour
To spice up the colour area, you could add a Layer Style. Use Screen and Multiply blending modes with white and black colour settings to avoid adding colour to channels other then “Cyan” (in my example) and “Black”.
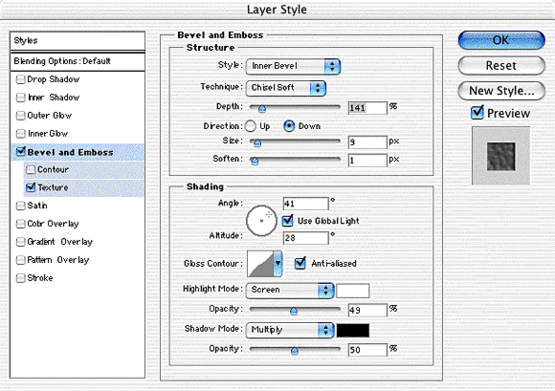
In my example I went wild with a Soft Chisel, Inner Bevel emboss and a shading effect that uses a customised Gloss Contour. Oooh, and I added a texture to the colour (overall creating a very wrinkley look!).
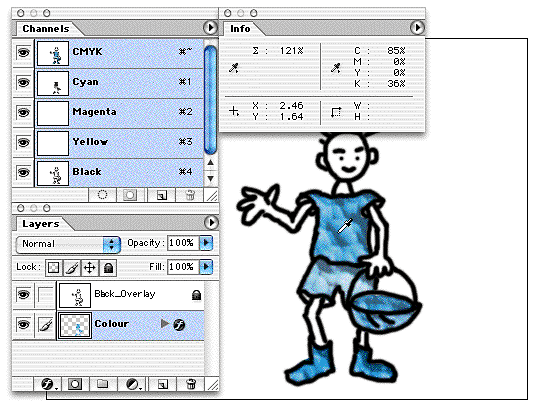
Notice that when the colour specifications are measured, only the Black and Cyan channel contain colour. The other two channel measurements read 0%.
Extracting the colour and black channels to new images
You can generate the 2 images required for overlay placement in InDesign using different methods. I thought I’d use the Calculations command for a change. Calculations are seemingly underused nowadays. Layers, layer masks etc have brought easier ways of mixing & matching images. They remain however a great way of creating new alpha channels (used for masking for instance).
(Just reminiscing: I remember struggling with calculations in Photoshop 2, when creating the black&spot covers for a publication containing a frame with inner “dropshadow”, which required a different image insert each edition; we’d use the Magenta channel for the “spot” colour simulation and calculations).
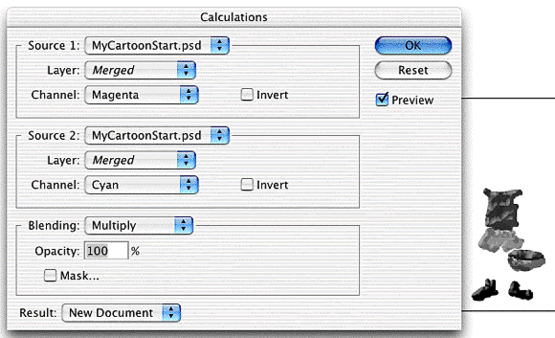
Combine a blank-channel (such as Magenta or Yellow) with Cyan (the Colour), and create a New Document. The document will contain a single Alpha-channel.
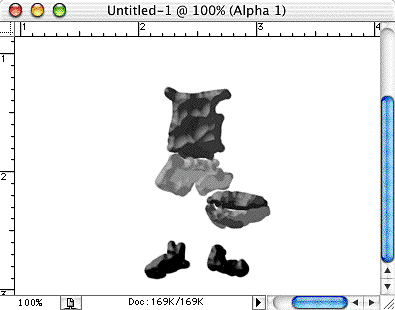
Convert the document to Greyscale and save for placement in InDesign. Repeat this action for Black. Then use Nick’s method for placement and positioning in InDesign (Colour image below Black image, setting black’s blending mode back to multiply and assigning appropriate spot to Colour).
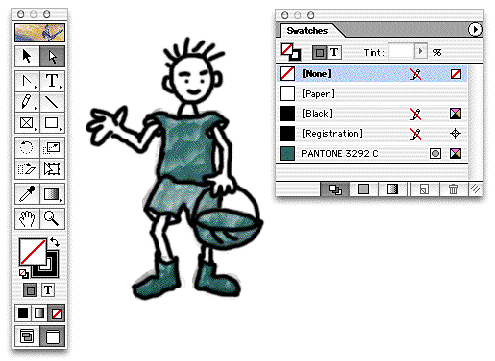
Maybe this cartoon tip is useful to some people. I enjoyed trying out my mini wacom tablet for the first time, which I’ve had for months but only plugged in recently (Thank you to Nathan for his generous gift!).
hey cool thank you!!!