Digitip 049 – Adobe Illustrator CS2
In today’s eSeminar “Discover Illustrator CS2”, I ran through the usage of the appearance palette as a powertool in Illustrator CS2. As promised I would post at least one eTutorial at the end of the seminar based on the End Poll question “which feature covered today would you like to see made into a podcast or eTutorial.”
What about appearances?
So what is it about the appearance palette that makes it such a cool palette? We can shuffle around with strokes and fills, add multiple strokes or fills to a selected path and apply all sorts of Effects found under the Effects menu in Illustrator. We can edit what we have done to our artwork in Illustrator and … we can save our coolest effects as Graphic Styles.
Settings strokes
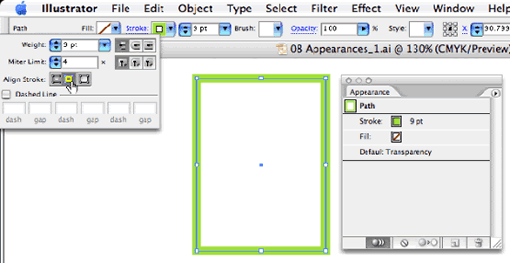
Let’s start with the inside and outside stroke setting. Rather than distributing the stroke width to either side of the path, we’ll select the path and from the stroke palette select “Align Inside”. The stroke will now appear on the inside of the path.
Adding the second stroke
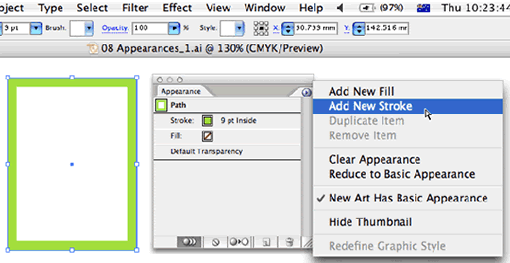
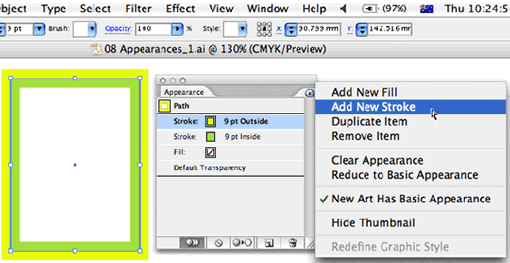
To add the second stroke, select Add New Stroke from the Appearance palette flyout menu.
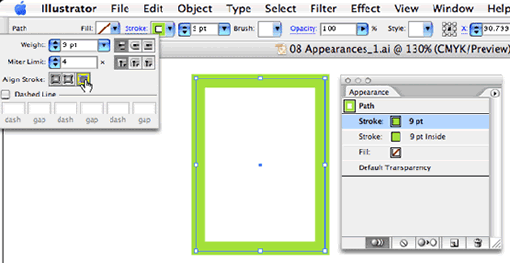
The second stroke is added and is automatically selected in the Appearance palette. We must now amend the settings for this second stroke. This time we’ll set the stroke alignment to outside, as indicated in the screen capture below.
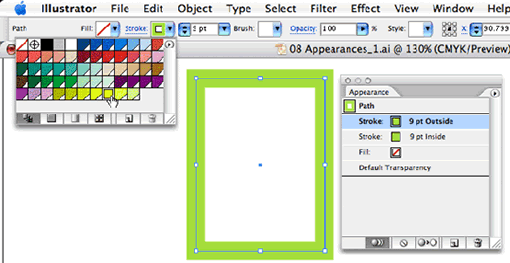
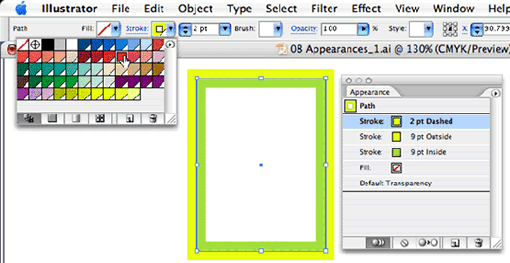
Whilst we’re in the control palette, we can also access the Swatches palette from the stroke dropdown menu, and select the second stroke colour.
If you access this same menu whilst holding down the shift key on the keyboard you will access the Colour palette instead of the Swatches palette.
At this point we’ve assigned two strokes to the single path. You can edit the shape of the path with out any problems, as the stroke settings will continue to follow the active path.
Let’s add the third stroke now, by adding another stroke from the Appearance palette.
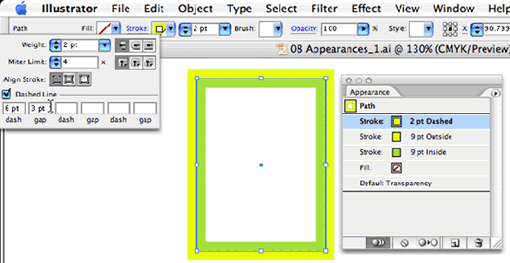
This time we’ll set the stroke weight to 2pt and we’ll enalbe the Dashed Line option.
Next select the colour for the third stroke from the swatches palette.
Adding the Effects
It’s time to start adding some effects now. Select the yellow stroke we created earlier from the Appearance palette (as it is this stroke to which we are going to add an effect).
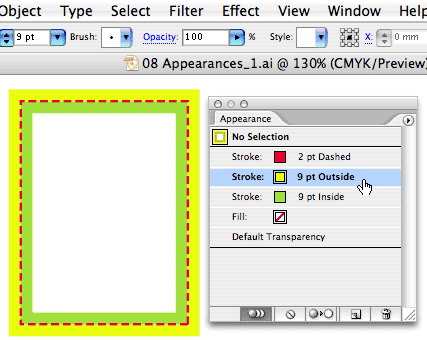
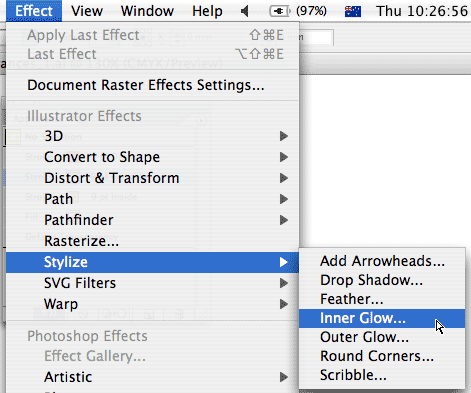
We’ll start by adding an Inner Glow to the yellow stroke by accessing Inner Glow from the Effect > Stylize menu
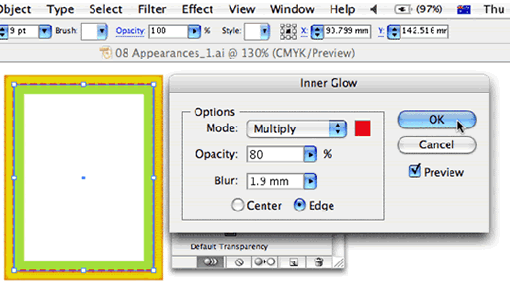
I’m applying a darker red with a multiply blend mode to the yellow stroke.
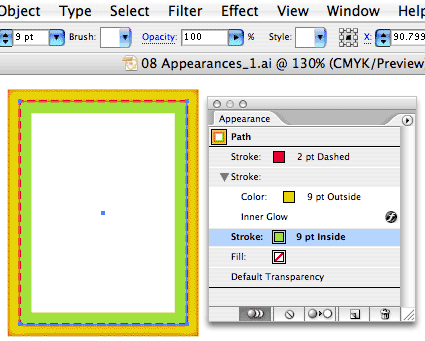
Next let’s select the Green stroke.
We’ll add a dropshadow, to this.
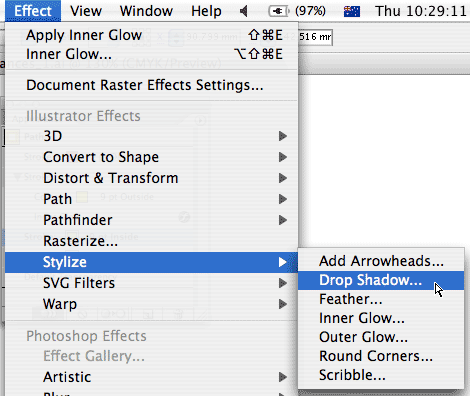
Enter your preferred dropshadow settings.
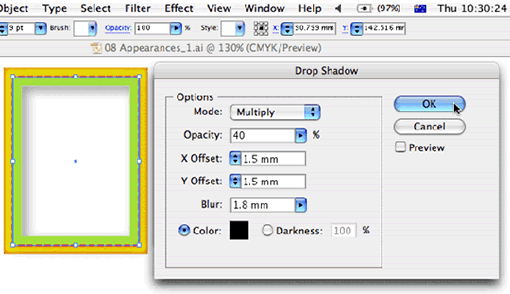
Then click Ok. The stroke appearance has now been achieved.
Creating the Graphic Style
To reuse these settings on other paths in your artwork without the need to remember all of the steps we’ve just gone through we’ll create a Graphic Style.
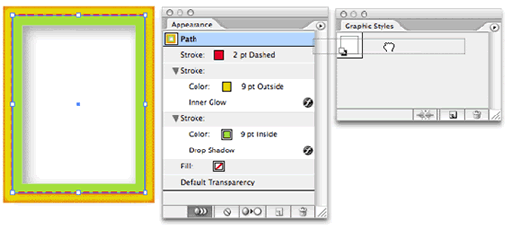
Graphic Styles store all of the settings. To create a graphic style drag the Path icon at the top of the Appearance palette into the Graphic Styles palette.
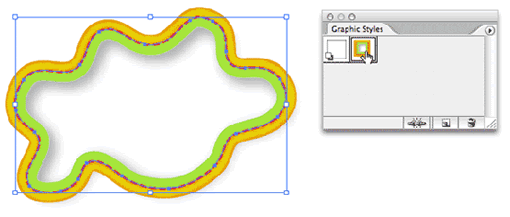
Select another path in your document and click the Graphic Style.
Editing a graphic style
If you want to edit a graphic style, then, start by selecting a path that has the style applied to it and edit any of the settings in the Appearance palette. For instance you might want to change one of the stroke colours.
To edit the effect settings for the applied effects, double click the effects in the Appearance palette and the related dialog boxes will reappear. Make the preferred changes then click OK to update the settings on the selected path.
The Graphic Style won’t update. Instead drag the icon from the Appearance palette back to the graphic style, whilst this time pressing the Alt or Option key on the keyboard, and drop the style onto the existing one to replace it.
Any artwork that had the previous style applied to it is now automatically updated.
Hi Cari,
I work with ads, and I wonder if it’s possible to set “Align stroke to inside” as default?
Thank you
Hi Lynne,
It depends a little to what you’re after.
Arrow heads on line segments are easily added in InDesign (Stroke panel) and Illustrator (Effects >Stylize).
To get a 3D look, you can use the Blend function in Illustrator.
Create two lines, slighlty offset one a thick stroke weight the other a thin stroke weight and blend these together…
You’ll probably find you have to run a blend command on the arrow pointers separately though, as even applying Object > Expand Appearance will probably not get you the desired result.
But the quickest method to get a 3D-ish looking curley tail would be to Blend two lines 🙂
is this what I would use to create a spiral arrow like a pig’s tail?