Fan of creative technology, elearning, instructional design and a little geeky

Scribbled Text

Digitip 031 – Adobe Illustrator CS

In previous Illustrator tips I’ve covered the Appearance palette, possibly one of the most powerful tools in Illustrator. The following tip looks at how multiple fills and stroke effects can make my Bogus Text look snazzy… (am I having a creative moment??)

The text

Start by typing some ‘bogus’ text and format it (size, font etc.). I’ve used Chaparral Pro Bold at 93pts.

target bogus text

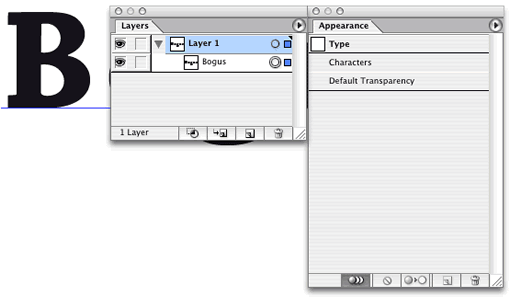
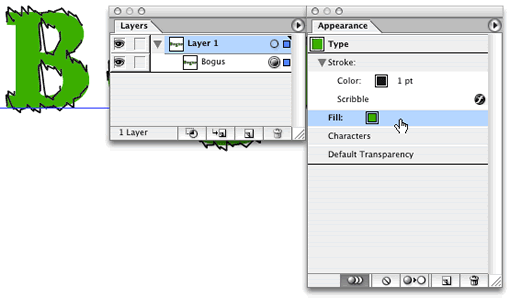
In the layers palette click the target next to text to select it (the double circle indicate you have targetted/selelected this object).

transparent text

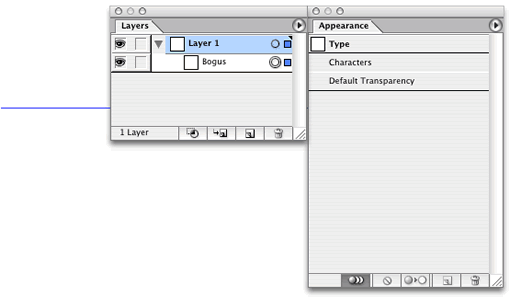
Set the default Fill Colour to ‘none’ (Activate Fill, then press the ‘/’ on the keyboard). You text will now be ‘invisible’ and the baseline and target icon next to the text will indicate your text is still selected.

We’re ready to scribble now…

Scribbled stroke

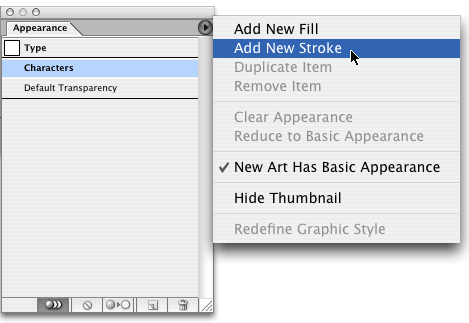
From the Appaerance palette fly-out menu select “Add New Stroke”.

add new stroke

Then Select  Effects> Stylize > Scribble to apply your scribbling affect only to the text outline (stroke).

scribble options

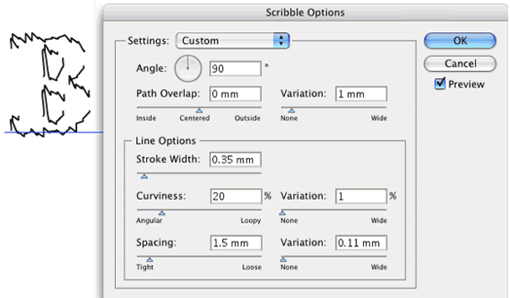
I’m using a small scribble with minimal variation. Tick the preview box to see your effect on the selected text. Once you’ve got the desired look, click OK to apply the settings.

Wobbly fill

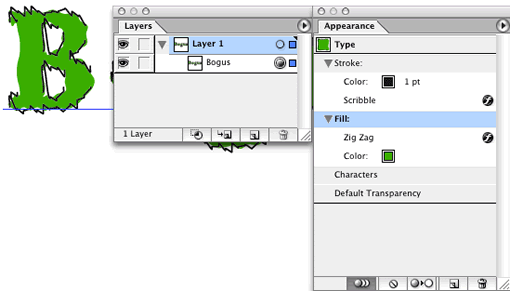
Now that the scribbling has been added, we’ll amend the fill settings. Click Fill in the Appearance palette and apply a fill colour (I picked Green).

select fill

Then with the Fill still selected in the Appearance palette apply a slight smooth zig zag effect to the fill shapes. Select Effects > Distort & Transform > Zig Zag.

zig zag settings

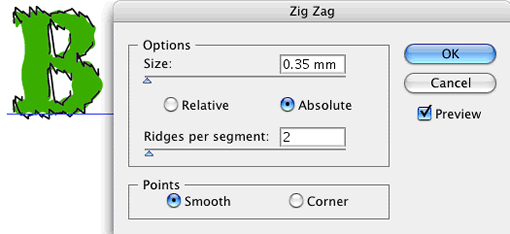
Again I’m applying a minimal zig zag effect (you’ll get some wierd effects if you overdo the zig-zagging…)

select fill

Now select the Fill again, and from the Appearance palette fly-out menu select “New Fill”.

add new fill

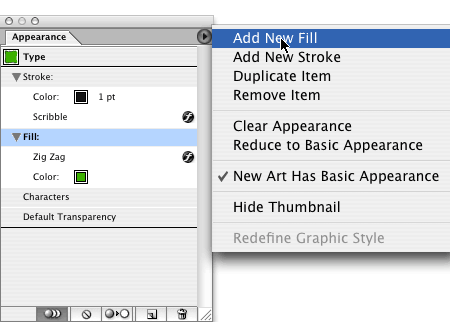
Apply a contrasting fill colour to this second fill (I picked yellow), this time we’re not zig-zagging or scribbling, instead we’ll apply a pretty decent feather to the fill.

feather

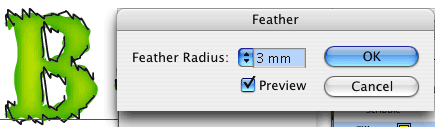
With only your new Fill selected in the Appearance palette, select Effects > Stylize > Feather.

final result appearance palette

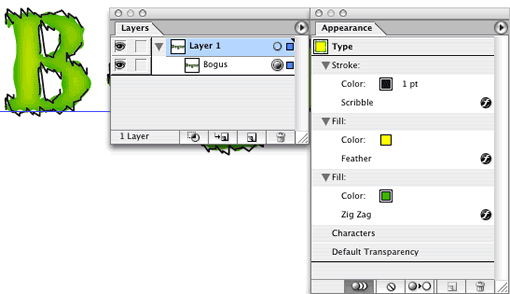
Using the Appearance palette, you can now still amend any of the scribble, zig-zag or feathering effects that were applied and amend any colours if needed.

bogus word scribbled

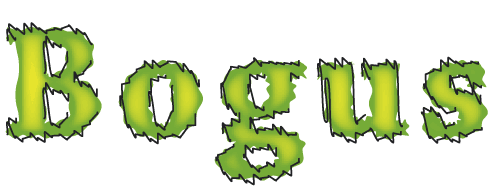
And if Bogus isn’t your favourite word, you can still alter the text to any other word or line of text you prefer.

Similar posts
  • How to create a tint for a colour in Adobe Illustrat... How can I make a tint for a colour in Adobe Illustrator? It’s a question I’m asked regularly by Illustrator users. There are two issues with the default settings when defining new colour swatches in Illustrator: When you apply the default colour swatches in Illustrator to your artwork, the swatch colour is not associated with the [...]
  • Illustrator CC (2014): Rectangle tool and Transform ... On June 18, Adobe released #CCNext. One of the applications updated in this release is Adobe Illustrator. We’re up to version 18 now with the Illustrator CC (2014) release. Renewed Transform panel and live shapes The renewed Transform panel contains a Rectangle Properties section that is active when you have a rectangle or rounded rectangle shape selected in [...]
  • Illustrator: Patterned Gradient Stroke Effect Illustrator CS6 introduces the ability to apply a gradient to a stroke. This means we can now create tubular looking line effects, without the need to use more complex blending techniques. In addition, Illustrator CS6 provides strongly improved pattern controls. We can now create not only rectangular pattern tiles, but also hexagon shaped tiles, and [...]
  • Creating PNGs from Illustrator We all get this question as designers: “Can you provide us with a copy of the logo or masterhead design in a format that we can use in Microsoft Word”… or “PowerPoint”? Illustrator CS, released back in 2003, introduced the Save for Microsoft Office command. (File menu), which converts your Illustrator artwork to a 150ppi [...]
  • Vertical Type from Illustrator to InDesign In my previous post I provided a solution for setting type vertically in InDesign. Illustrator in contrast to InDesign actually has a Vertical Type tool, and the close integration between the two applications means we can opt to set our type in Illustrator instead and bring it into InDesign as a [...]

No Comments Yet

Leave a Reply

Your email address will not be published. Required fields are marked *