Digitip 001 – Adobe InDesign 2
(Revision 1.2)
Possibly the more difficult feature to get used to when converting from another page layout program to InDesign, is the way in which images are handled. I often receive questions from people in regards to sizing images using keyboard shortcuts. The following tips focus on resizing images proportionately.
Manual resizing
scale image + resize frame:
Select image with selection tool,
Apple+Shift (Ctrl-Shift [pc]) drag one of the corner handles.
Release Apple+mouse button, before releasing keys on keyboard

image only:
Select image with direct selection tool, shortcuts as above.
Incremental resizing:
image + frame :
Select image with selection tool
small increments (approx. 1% increments):
Apple+< (or >)
Ctrl+< (or >) [pc]
Large increments (approx. 5% increments):
Apple+Option+< (or >)
Ctrl+Alt< (or >) [pc]
image only:
Select image with direct selection tool
Small increments (1% increments):
Apple+< (or >)
Ctrl+< (or >) [pc]
Large increments (5% increments):
Apple+Option+< (or >)
Ctrl+Alt< (or >) [pc]

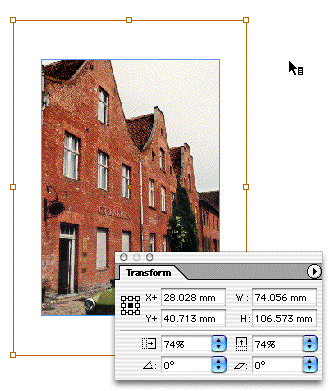
Note: the resizing occurs from the centre outward/inward ONLY if the centre reference point has been selected in the transform palette.
Using Free transform tool
To scale image & scale frame together :
Select image with selection tool, then select free transform tool and Shift drag one of the corner handles.
To scale just the image:
Select the image with the direct selection tool, then select free transform tool and Shift drag one of the corner handles.
Note: the incremental methods works with this tool as well (see above)
Using Transform palette
image + frame:
select image with selection tool and set the preferred reference point.
- enable “transform content” from the palette fly-out menu
- enter percentage in either vertical or horizontal scale [or] enter new W or H value
- then press Apple+Return (Ctrl-Enter [pc])
image only:
Select image with direct selection tool steps 2 & 3 only (see above).
And then there is right-mouse-click Transform>Scale as well…
Warning: There is a difference between sizing and scaling of images and frames. When scaling frames (transforming), the strokes will also scale up or down. To prevent this from happening us a resize option for the frame and a scale option for the images.
Note: If you are having problems using the keyboard shortcuts and are using OS 10.2.4, you might want to consider upgrading to OSX 10.2.5 this will fix the problem.
Leave a Reply