Digitip 002 – Adobe Illustrator 10
Remember the days when we used to create roadmaps, using zillions of paths with various stroke weights and colours. The days when we had no layers in Illustrator? Phew, the appearance palette & styles really have come to the rescue. It’s magical!
Start: creating a simple road
Select a previously drawn path and from the appearance palette fly-out menu select Add New Stroke.
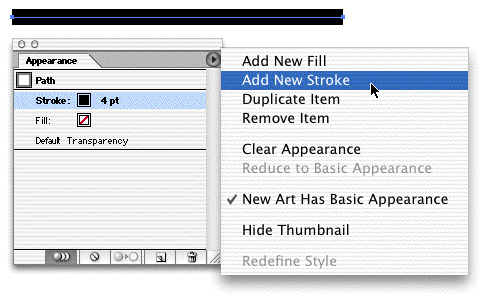
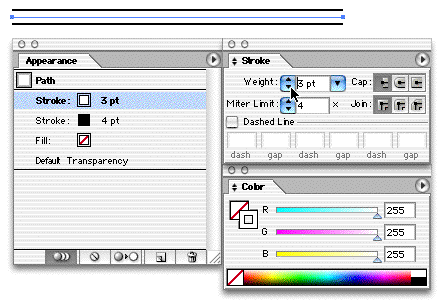
Select the new stroke and amend the stroke weight and colour.
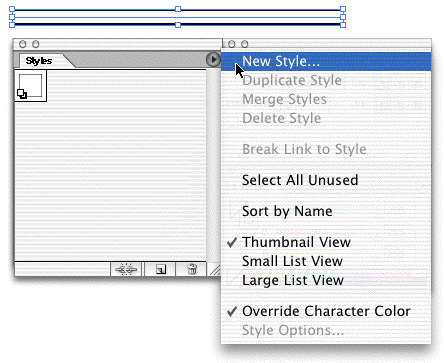
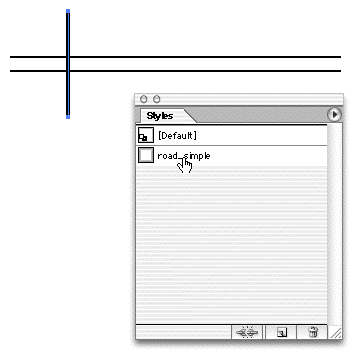
Creating a new style
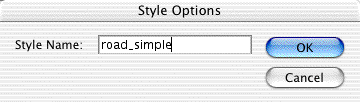
Styles come in handy when you want to reuse the same settings for various strokes. Select the path with the simple road appearance, then from the Styles palette fly-out menu select New Style. Name the style and change the palette view to “Small List View” to view the styles by name. You can repeat these steps for every style you create.
To apply a style to a stroke, select the stroke, then click the style name in the styles palette.
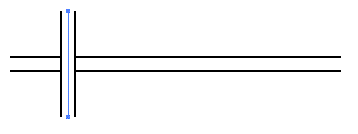
To generate an overpass look, draw an additional path, select it and select the preferred road style from the styles palette.
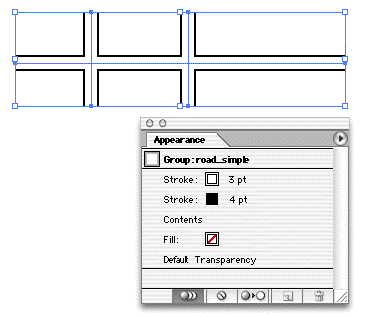
To create intersections without overpasses, create a number of paths and group them together before assigning a style to them.
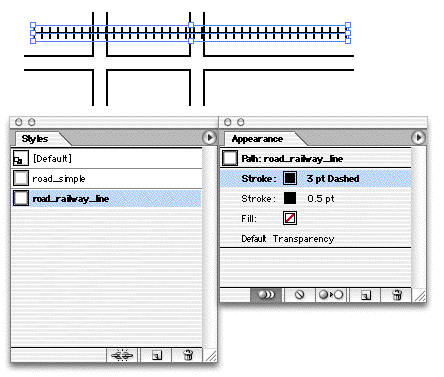
Strokes can contain dashes as well, amend the dash settings and stroke weight , using the same “Appearance” method.
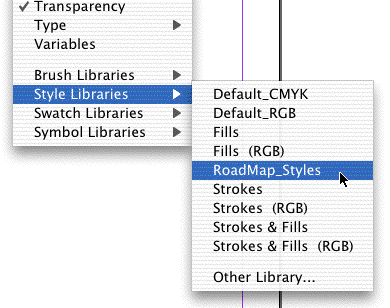
Creating a style library
Styles can be reused in other documents, when they are added to the Presets/Styles folder (inside the Illustrator application folder). Create a simple piece of artwork and remove all irrelevant styles (and brushes, swatches etc). Create all your personal styles and save the Illustrator document (which can have a blank page!) into the Styles folder.

Your personal style library is now available from the Windows>Style libraries menu.
Creating more complex maps
Basic styles can be used to draw simple maps. For more complex maps, you might find that you need to expand your stroke into multiples strokes for which the stacking/layer order can be amended. The Object>Expand Appearance menu “breaks” the single stroke appearance into multiple strokes, each with their own colour, weight and dash (and effects) setting.
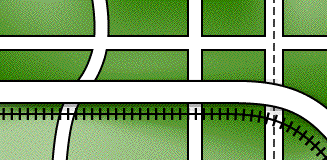
Illustrator comes with a range of premade styles, all accessible from the Style Library menu. Load and apply some of these existing styles to get a feel for what styles (and appearances) can do! It’s pretty cool I reckon!
Leave a Reply