Digitip 077 – Adobe InDesign, Gridded Images
Last Modification: 1-April-2009
The following tip looks at a few ways of working with image grids in InDesign.

Creating a Grid 101. To create a grid in which we can place images, start by drawing a rectangle frame about the size of the overall grid you’d like to create.
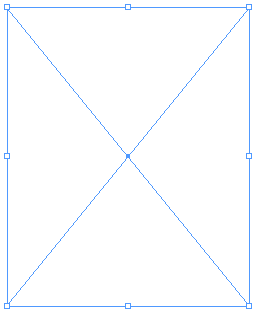
Next set your Frame Fitting Options (see previous post), with crop settings set to “0”
Creating the Grid
From Window > Automation, select Scripts. Olav Kvern has written some scripts that install with InDesign. In the Scripts panel, double click Application > Samples > JavaScript. The script we’re looking for is called “MakeGrid”.
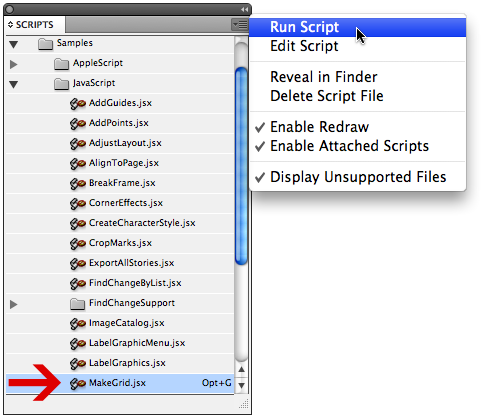
We’re ready to run this script.
Oooh stop… You might find this such a cool script that you’d like to apply a shortcut to it, so you can use this as a command in the future without the need to navigate to the script in the scripts panel? (as is the case in my Scripts panel…). Easily done. Navigate to Edit > Keyboard shortcuts…, create a new Keyboards shortcut set if you’ve not done so yet previously, different to Default yet. (Click New Set.., then enter Name and choose based on option… normally that would be ‘Default’). Choose Product Area: Scripts and locate the script for which you’d like to add the shortcut. Enter the new shortcut, by pressing the preferred shortcut keys on the keyboard. Check the the shortcut you’ve chosen is unassigned (or else it will override other shortcuts in InDesign), then click Assign and OK…
Use the newly assigned shortcut or double click the script in the Script panel or select the script then choose Run Script from the panel menu to execute the script. A dialog appears asking you to enter the grid settings.
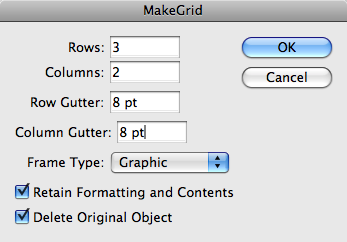
See as we’ve set Frame Fitting options for our graphic frame, we’ll opt to retain the Formatting and Contents, and as we won’t need the overall frame any more we’ll opt to remove that Original Object. Frame Type is Graphic. If you’re used to entering measurements in units other than points, you can enter those as well. E.g. enter .1 inch as “0.1in”, or enter 2 millimetres as “2mm”. Click OK to generate the Grid.
Note: this script has one nasty side effect: It changes the unit & measurement preferences in InDesign… These are easily reversed back to what you had before, right-click in the rulers and select your preferred preferences.
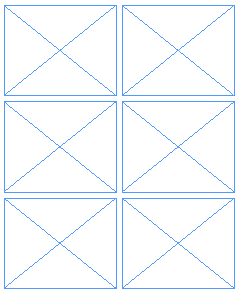
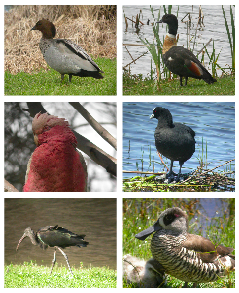
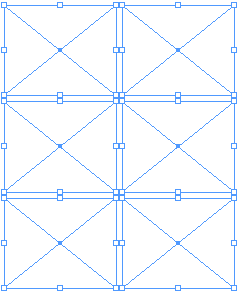
The Grid has now been created and we’re ready to select multiple images for insertion in the various frames.
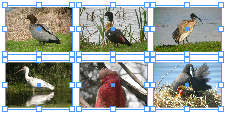
Multiple images in individual frames

After placement we’ll look at a nice collection of images, beautifully aligned and distributed and set to our page with minimum effort.
One image in many frames
So what if you want one image in multiple frames? Well let’s go back to the point where we’d generated the Graphic Frames Grid… With the Selection Tool, select all of the Graphic Frames created earlier.
Next select Object > Paths > Make Compound Path
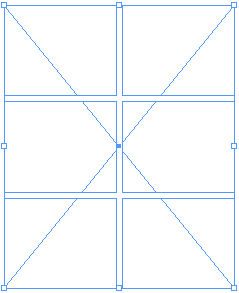
Notice the large ‘X” on the frame? The Compound path command is making the series of frames behave like “one”. This means we’re now ready to drop in that pic 🙂 to get to a different looking finished result.
Gridding it during placement (CS4)
There is another cool trick to add. We know that we can select multiple images right? and then place them on the page in InDesign? Using our cursor keys to toggle through the images?
But what about creating that grid right there and then?
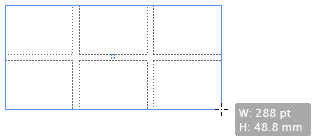
Start by selecting multiple images for placement in the File > Place dialog (or use the Bridge as previously shown).
Press Command+Shift (Mac) or Ctrl+Shift (PC) and start click-dragging with the Loaded Placement Cursor.

Release the Cmd+Shift / Ctrl+Shift keys once you start dragging, but do not release the mouse-button.
Press the Left/Right Arrows in increase/decrease number of columns and press Top/Down Arrows to increase/decrease number of rows for the dynamic grid you’re drawing.
To Increase/Decrease the spacing between the columns and rows. Press the Shift Key whilst you’ve still got the mouse button held down and use the Left/Right Arrows to increase/decrease the space between columns and Top/Down Arrows to increase/decrease the space between the rows for the dynamic grid you are drawing.
Once you release the mouse button the selected images will be placed Left to Right, Top to Bottom with a Frame Fitting option set to “Fit Content Proportionally” and placement in Centre of frames.
@Ekidna
you’re referring to the Auto-Fit setting that was introduced for images in CS5 I’m guessing?
you can also apply a live distribution in CS5.
Cari
hi
but during a presentation I saw that the grid then was able to flow and change che size and the images following it..
here instead then all images are independent
😕
thanx