Back in 2004 I wrote a tip for InDesign CS on how you could have the first page of your document be a left page AND have it start with page number 1. It’s hard to believe this is almost a decade ago… But a recent question on Facebook, made me think I should really update this post, and provide you with the newer, faster, quicker way to do this.
I must emphasise that the way in which you add additional pages to your document does impact on whether the left hand pages continue to be odd-numbered pages. Keep an eye out in this tip for some techniques you can use to add pages.
Starting from scratch
Let’s assume that at the very start of your project you’ve decided you want to swap your odd and even numbering to be ‘even’ on right (recto) pages and ‘odd’ on left (verso) pages.
We can skip a few steps right at the very start when creating our InDesign document.
- Select Document from the File > New menu.
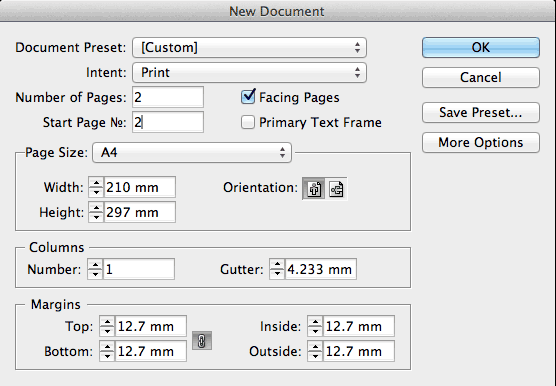
In the New Document dialog box:
- Select Facing Pages
- set Number of Pages to 2, and
- Start Page No to 2.
- Click OK to create the new document.
We are now ready to make some changes to the way the pages are displayed in InDesign.
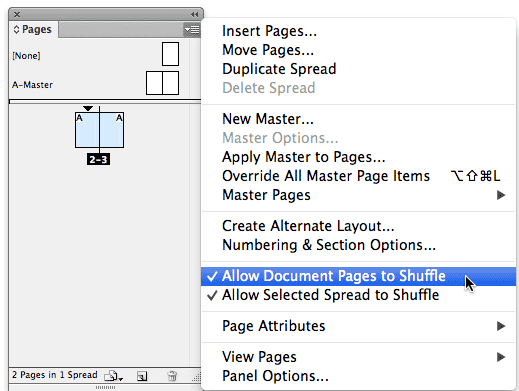
- Select Pages from the Window menu to display the Pages panel
- Select Allow Document Pages to Shuffle from the Pages panel menu, to remove the checkmark in front of it.
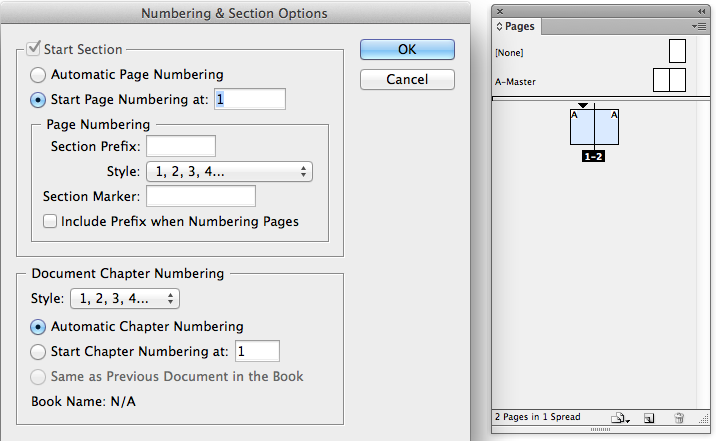
We are now ready to change the page number of the first page in the document to number ‘1’
- Double-click the little black triangle at the top of page 2 or select Numbering & Section Options from the Pages panel menu.
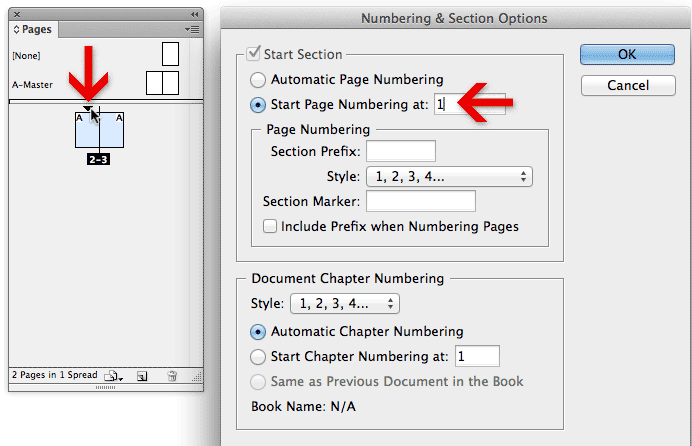
In the Numbering & Section Options dialog:
- Change Start Page Numbering at 1.
- Click OK.
Adding more pages
There are a couple of ways in which you can add more pages to your document whilst maintaining odd-numbered verso pages.
(1) Using Insert Pages command
To add more pages:
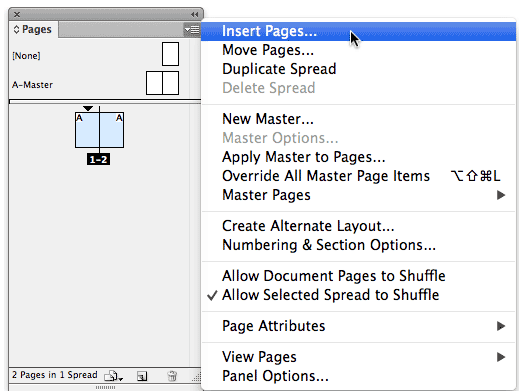
- Select Insert Pages from the Pages panel menu.
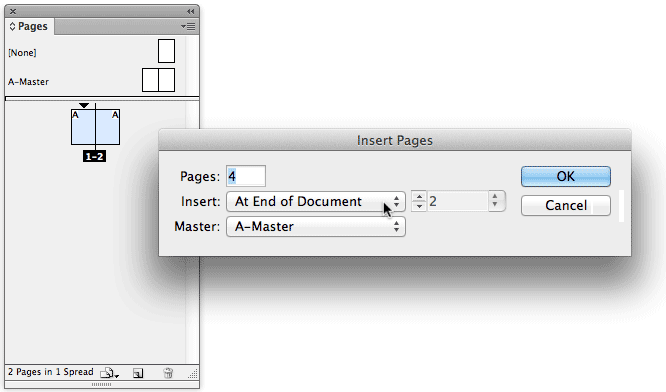
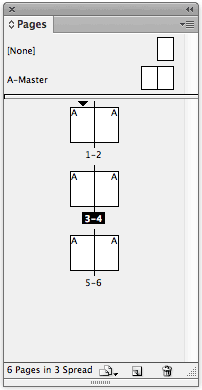
In the Numbering & Sections Options dialog box:
- Enter number of pages to insert in the Pages field
- Select At End of Document from the Insert menu
- Click OK.
(2) Drag Master Page spread
A second technique you can use to insert additional pages whilst retaining the odd-numbered left pages, is to drag a new master spread into the document.
To do this:
- Select the A-Master spread (or other master) in the Pages panel. You can either Shift-click the left and right page in the spread, or double-click the A-Master name in the pages panel, or click-drag the ‘A-Master’ name (this auto-selects both pages) for this.
- Drag to the right of the pages after which you want to insert a new page spread.
- Release the mouse.

If you’ve discovered other techniques that work, send me a link to a blog-post you might have written about this or add additional tips in the comments. I’ll include a list (with credit naturally) at the end of this blog-post.
Very helpul, thanks a lot 😀
Thanks Nikola 🙂
Excellent tutorial. So many people are puzzled with this issue, and if I remember there is no explanation for it in the InDesign help files.
Not that you need this kind of adjustment so often but it is good to know.
I will be glad to retweet this post.
Regards