Digitip 013 – Adobe Photoshop 7
How do I create one of those nice looking soft edge transparency effects on a photo? There are dozens of methods of creating this effect in Photoshop. The following is a quick ‘n easy method, that not only retains the original image information, it also allows for quick ‘n easy image updates at a later stage (even when already placed in InDesign).
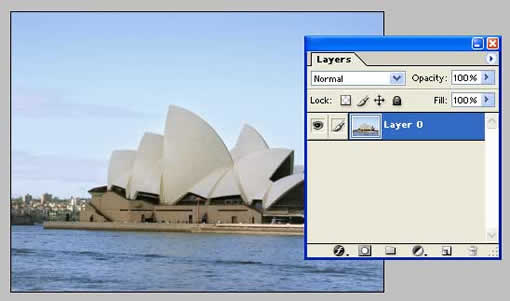
Start by creating a layer for the image that is to have the soft edged transparency effect. If the image opens with only a “background”, then double click the Background to make a layer.
Layer Mask
Next, select the layer and click the Add Layer Mask button in the layers palette.
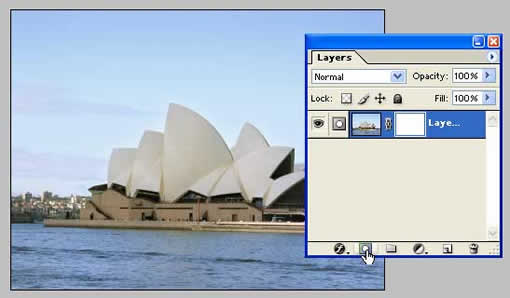
A blank layer mask is added.
Gradient edge technique 1
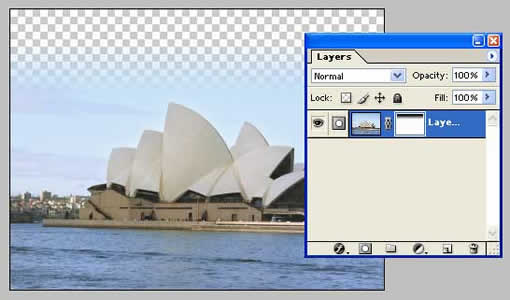
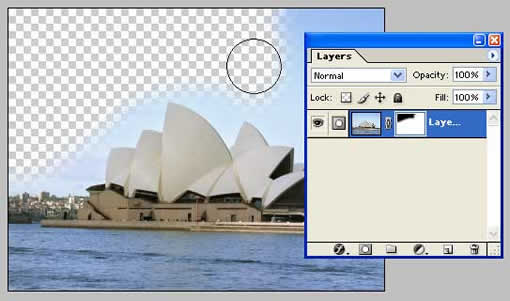
To create an even looking soft edge on one side of the image, select the gradient tool, then select the black, white gradient from the gradient presets.
Select the layer mask, then using the gradient tool , click-drag from point 1 to point 2. Everything North of 1 will become transparent, everything South of 2 will retain original image information. Between point 1 and 2 a transition occurs from transparent to original image information.

If you are not happy with the result. then simply repeat the click-drag motion, until you’ve got a result you can smile about.
Increasing the distance between point 1 and 2 will give a wider gradient (soft) edge, decreasing will give a shorter gradient (soft) edge.
Save the Photoshop file, and place in InDesign.
Using soft edged brush – technique 2
Select the blank layer mask and use a soft edged brush (paint with black) and “paint” transparency.
A reasonably sized brush works best here.
Tip: Set foreground/background colour back to Default (press D on keyboard), use the [ and ] keys on the keyboard to decrease or increase the brush size, add the shift key and you decrease/increase the hardness of the brush. To remove transparency press “X” to swap foreground/background colours, and “X” again to recreate transparency.
Save the Photoshop file, and place in InDesign.
Placement in Adobe InDesign and automatic update
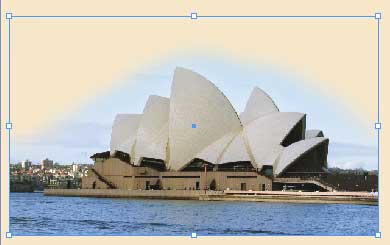
Place the image above a coloured background or other image to see the transparency effect. If the effect isn’t quite like you’d wanted, select the image and right mouse-click Graphics>Edit Original in InDesign.
This will re-open the image in Photoshop. Make the required change to the mask in Photoshop, then save and close the Photoshop file. On return to InDesign you will immediately view the amended result.
Pretty cool integration of Photoshop and InDesign I reckon!
P.S. thanks for reminding me to add this tip Bob!
Leave a Reply