Digitip 059 – Adobe InDesign CS3/ Typefi AutoFit
At the InDesign Conference, a gentleman in the audience asked “when I set a text inset for Text Frame, and apply different insets for Top, Left, Right and Bottom, I loose this functionality when I apply a Corner Option to the frame, it turns to Inset”.” Is there anyway around this?” The answer is “Yes, but you’d need to apply a little trick AND use the AutoFit plug-in for InDesign that Typefi Systems has just released”. The plug-in will not cost you a cent and can be downloaded from the Typefi web-site.
The issue
The issue the gentleman at the conference described indeed occurs as soon as a Corner Option is set for a text frame.
The Text Inset under Object > Text Frame Options… changes from Left, Right, Top, Bottom to Inset. In a similar manner to the change you see in Text Wrap options for Offset as soon as the object isn’t a rectangle anymore.

The AutoFit Solution
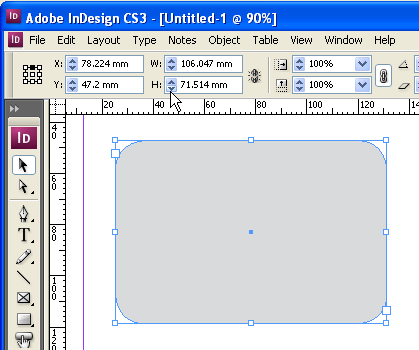
Start by drawing a rectangle and add the required Rounded Corner Option setting. (Object > Corner Options).
Next create a Text Frame that is almost the same size (just make it a tiny bit less deep). To create the second frame in the same spot you could: Copy the current frame, Edit > Paste in Place, Change the pasted frame to text frame (Object > Content > Text), then Set Object Style to Basic TextFrame (assumes you haven’t amended this setting for your document).
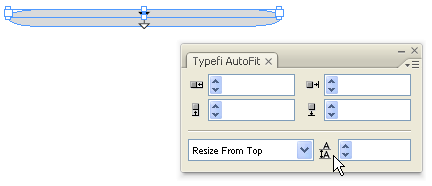
Click the top middle Reference Point and make the frame a bit shorter.
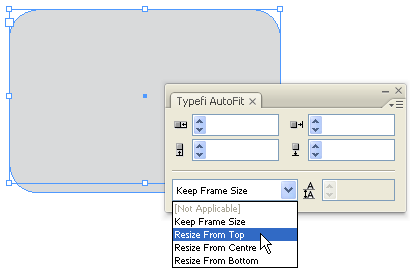
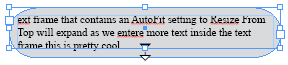
Launch the Typefi AutoFit panel and select the Text Frame. Set the ‘grow’-behaviour for the frame to Resize from Top. This means that when more text is added to the frame, the top of the text frame stays in the same spot and the bottom expands.
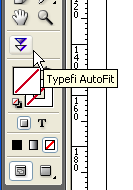
We now select the Typefi AutoFit tool from the bottom of the InDesign Toolbox and Set a Parent Child relationship between the bottom of the Text Frame and the bottom of the underlaying Rounded Corners Frame. Click the bottom of the Text Frame, then Click the bottom of the Unassigned Frame with the Rounded corner. A Relationship line appears, and the parent-child relationship is indicated by the black-white markers. Set the Baseline Gap value for the text frame to “0”
This relationship causes the bottom frame to grow when the Text Frame grows as a result of more text input.
The great thing is that you can set your text inset on all four sides as the text frame itself doesn’t have a corner option applied to it. Pretty Cool stuff.
@Dani
You’re absolutely correct. In fact in later versions of InDesign you don’t even need to ungroup… just double click the group to isolate the components and resize them.
This blog-post was written in context of a presentation I held at a conference, in which I also showcased the plug-in that I’m focusing on in this write-up 🙂
Especially for shapes that only have one, two or three rounded corners, this plug-in will cause the text frame to automatically increase in size AND take all related objects with it… thereby retaining the structure of the design.
Of course InDesign CS5 makes all of this even easier again 🙂 with Live Corner Options 🙂
I may be densed,,, but this is so complicated when it can be done so much more simpler. You have to install a plugin for this task?
Can you please compare to my way and explain what I am missing ?
1) You create one object and another text object above.
2) You apply corner options to the first object and perhaps even a background colour
3) Align your text object accordingly to your needs above the background object
4) Group both the objects and you are done!
5) If you need to adjust settings to a specific object then just ungroup, make the settings, and then regroup again.
When you change the size of the text object the cornered background object will follow
@Ramesh
The Inset Spacing value is always set on a Text Frame, you can not disable it, but you can amend the settings.
To ‘release’ text inset, you select the Text Frame, then choose Object > Text Frame Options and set the value to ‘0’.
Cari
How to release the text insert? Please explain from your first overview pictures…
Thanks very much! Keep up the good work..
Thanks Mark 🙂 Wish I had more time to work on this 🙂 But stay tuned more tips will be added 🙂
I stumbled across this site looking for something. I don’t remember what I was trying to find. I’m a retired and a former MS MVP, and I think this page looks great! It’s clear and consise. It gets your message across that you know what you are doing. It also gives those in need some information to help them along. Keep up the good work and best wishes to you.
Thank you for the nice note Sally. I’m glad to hear the tip helped you out.
Thank you. I am a new user but you explained this clearly and simply.