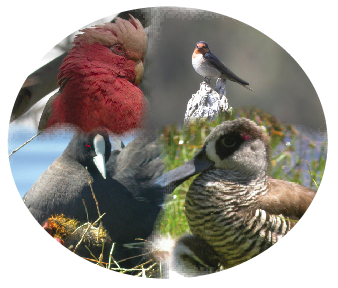
The Feathered Collage
During the Image Magic session at the last Perth InDesign User Group meeting we looked at how we could create a feathered collage in a circular/elliptical shape using only InDesign.
Start by drawing some basic wobbly shapes using the pencil tool or the pen tool (if you’re game…) . I’m using the pencil tool here, as I’m working with a digital drawing tablet instead of a mouse. To close the shape when using the pen tool, press the Alt/Option key on the keyboard and and release the pen/mouse. If you’re using the Pen Tool, then position the cursor over the start point and when you see the small circle icon click.
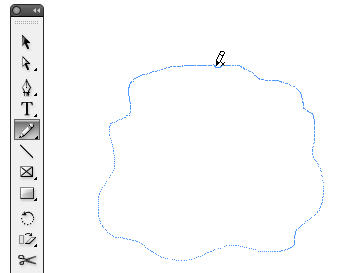
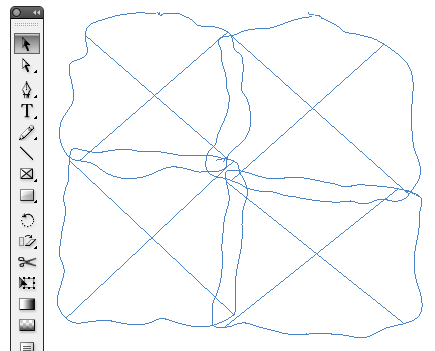
Draw a series of these blobs, and ensure you have a fair overlap between the objects.

As I’m using the pencil and pen tool generate ‘unassigned’ frames. As I’m intending to set the stroke colour to “none”, I wouldn’t be able to see the frames on the page.
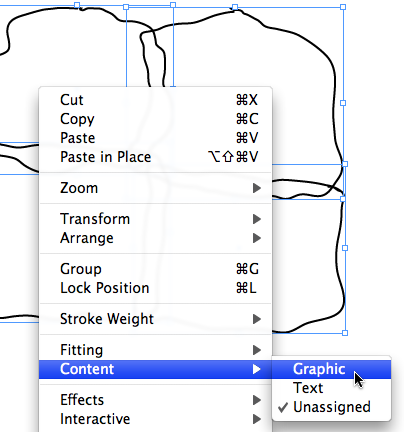
So, I’m changing the Content for these frames from “Unassigned” to “Graphic” (Object > Content > Graphic).
With the frames converted to Graphic Frames we can now at least see them on the page 🙂
Prior to placing images in the frames, we can set the Frame Fitting Options for the empty frames, so that images, when placed, are automatically positioned and resized according to the Frame Fitting Options set. Choose Object > Fitting > Frame Fitting Options to set these settings. The following dialog appears.
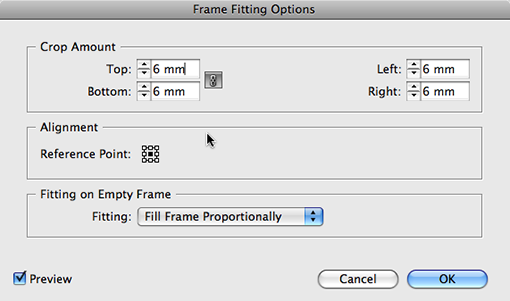
I’m entering a positive crop amount, in order to ensure part of the image still falls outside the graphic frame. Image alignment option set to centered and Fitting on Empty Frame (Frame Fitting Options) set to “Fill Frame Proportionately”, which means the image will always fully fill the selected frame without being distorted.
Click OK to enforce these settings
Placing the images
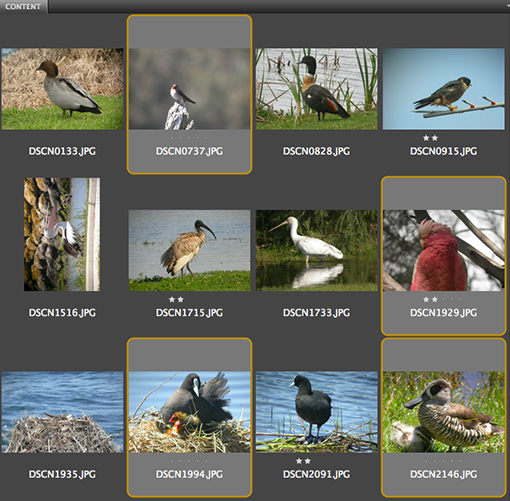
Time to find some cool graphics to place and what better application to use for that then Adobe Bridge? Select the images you want to place in InDesign. To select multiple non-consecutive images press Ctrl(PC) or Command(Mac) whilst clicking the images.
To Place the selected images in InDesign, choose File > Place > InDesign. This command automatically takes you back to InDesign and you’ll see the Loaded Graphics Icon.
To get the images to InDesign without using the Place command in Bridge: Start dragging the selected images from the Bridge and choose Alt+Tab (PC) or Command+Tab (Mac) to swap back to InDesign and place images.
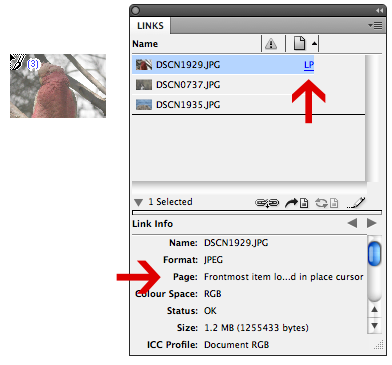
To choose which of the selected images you’ll be placing: Press the arrow-keys on the keyboard to toggle through the various graphics you have selected. The Loaded Graphics Icon will display a preview of the graphic (CS4).
If you’re not entirely sure which image is selected – it could be that all images are very similar and your previews just don’t cut it… – then take a look at the Links panel. The active graphic in the loaded cursor will be highlighted and the LP link points to the fact that these images don’t exist on the page yet, but are “Loaded in the Place cursor”.
With the correct graphic displayed click the graphic frames one by one, until all graphics are placed.

Loaded Place cursor (above)
Use the Position Tool (hidden behind the Direct Selection Tool), to select the various images and reposition or resize the images as they are displayed in their frames. To immediately see the masked portion of the graphic, double click the Position Tool and set the Position Tool Options to “no Delay”.

Feathering
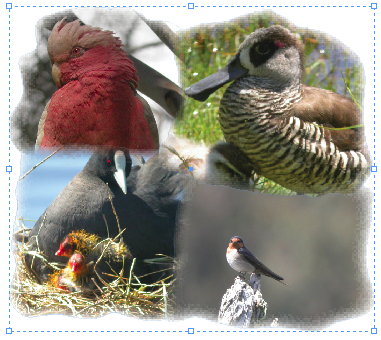
Time to apply the feathered effect we see on the edges of the images in the sample at the top: Select all graphics with the Selection Tool, then from the Effects panel Object Effect dropdown select Basic Feather.
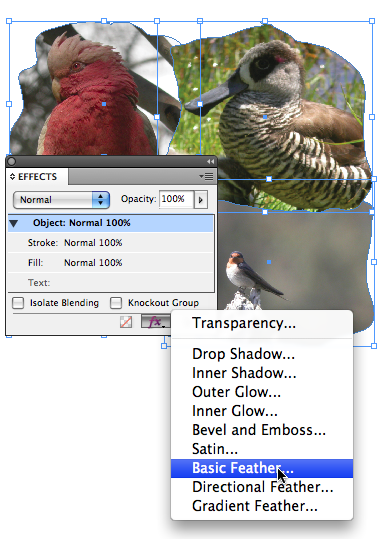
The settings you enter really depend a little on taste and personal preference.

The Feather Width determines how wide the feathered edge will be. The Choke setting is a bit like putting the break on the feathering effect. A higher setting means that the distance over which the effect fades into full transparency is reduced. The Noise setting breaks the computerised look of digital feathering a bit by ‘scattering’ the edge pixels on the edge of the effect. It will generate a smoother effect. The Corners setting controls how the effect is applied to the path it’s attached to. In the blobby example here, Diffused gives a nice look, but have a play with these effects when you’ve got rectangular or star shaped objects and you’ll notice signficant changes to the behaviour…
Nesting Frames inside Frames
We’re ready now to start inserting this collage into another frame. First let’s group the four images together. Select all graphics with the Selection tool, then choose Object > Group. A dashed line around your artwork indicates the group’s been created.
Next draw the shape you’d like to use as your new ‘Mask’ for the collage. I’m using the Ellipse Frame Tool to draw an ellipse and am positioning it roughly in the correct position over the top of the grouped set of images.
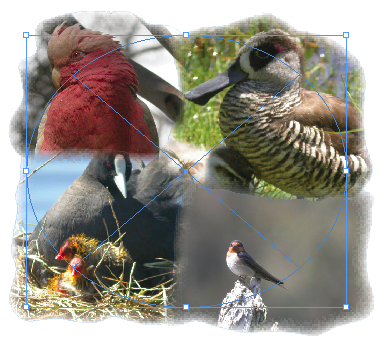
Now select the group in the background, and choose Edit > Cut to remove the group from the page. Next select the Ellipse drawn in the previous step and choose Edt > Paste Into.
Editing after placement
You can still edit content of the grouped graphic after placement.

Double click with the selection tool on one of the graphics, to isolate the path itself and access the Direct Selection tool. You can then use the various path editing tools to change the shape of the path.
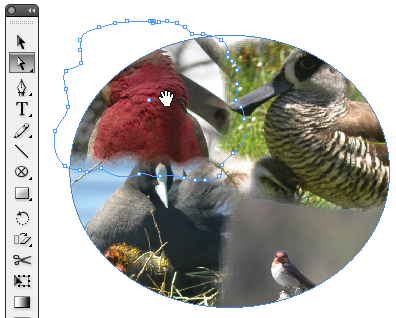
Click one more time after double clicking with the Selection Tool (which toggles to the Direct Selection Tool) to access the graphic itself and reposition it in its own graphic frame using the Direct Selection Tool.

With the image selected (Direct Selection Tool), double click one more time to jump back to the Selection Tool and have the ablity to move the selected graphic within its sub-group. Keep an eye on the cursor icon when doing this. Move by either selecting the centre point or one of the edges. (Note: Alt-clicking with the Direct Selection tool will result in selection of all of the frames that form part of the sub-group, and could be used as way of accessing content of elliptical parent frame).

To move the position of the grouped-set of graphics in its parent frame, select the Position tool and click and drag. A dashed line appears around the bounding box of the group.

Click and drag the selected content to move it. Until you’re happy with the result.

Once you have access to content within content, you can really make any change you’d like. For instance I ended up flipping the image of the Gallah and moving the two images on the left around.
Those were great directions! Thank you so much!
Hi Mairead,
Sorry I only just noticed your question here. Basically you use Edit > “Paste Into” to paste into a selected shape, not Edit > “Paste”. hope this helps.
– Cari
Hi!
Thanks for the great help with this page but I got as far as nesting frames within a frame and from there couldn’t get it to work!
I drew the second frame using the ellipse tool but when I went ‘edit-cut’ then selected the ellipse and went ‘edit-paste’ it didn’t paste into the shape.
Can you help me please?
Thanks,
Mairead, Irealdn