The following tip gives an another example of how the Free Typefi’s Autofit plug-in – downloadable from >www.typefi.com can be used with InDesign. In this tip you’ll learn how to create a one-to-many relationship that results in a background tint with two rounded corners expanding as the parent text frame grows.

Changing height of path issue
One of the problems we have in InDesign is, that when you change the depth of the path below by selecting on one of the bounding box handles, the corners on the path will distort.

Incidently, the path was created using the cornereffects script (see digitip 067) . In order to work with a similar looking shape that expands, we’d need to chop the shape into three pieces and control the growth of the middle section and the movement of the bottom section with the set-up of AutoFit relationships.
Let’s get started.
Setting the resize behaviour
First of all the text frame must be able to automatically grow as more text runs into the frame.
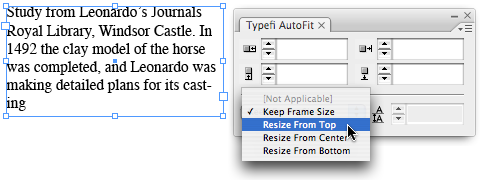
Select the Text Frame, then in the Typefi AutoFit panel select Resize From Top. An automatic baseline gap is set, if you’ve left some space between the bottom of the last baseline (lower-case x) and the bottom of the frame.
Setting parent-child relationship number one
The first parent-child relationship will cause the bottom shape to reposition itself as the text frame is moved down or grows as a result of more text insert.

Select the AutoFit tool and click the bottom of the text frame, next click the top of the bottom shape. Moving the text frame down results in the bottom frame shrinking… which is not quite what we’re after. To prevent the bottom frame from shrinking we’ll lock in the minimum/maximum frame width/height settings.
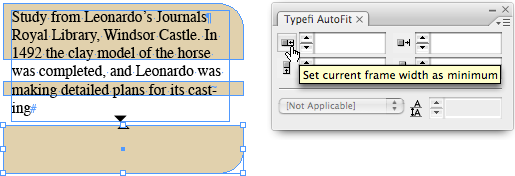
To match the current frame width and height settings, click each of the buttons left of the minimum frame width, maximum frame width, minimum frame height and maximum frame height settings in the Typefi AutoFit panel.
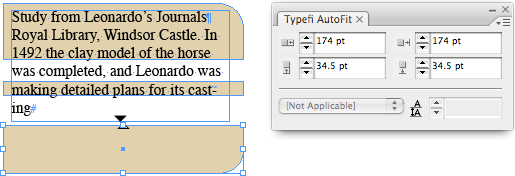
Moving the text frame downward now results in the bottom shape moving with it. As a matter of fact, what the parent-child relationship does, is retain the distance between the bottom of the text frame and the top of the bottom frame as a constant value.
Setting parent-child relationship number two
Time to set the second parent-child relationship now. This by the way will create what is referred to as a one-to-many relationship. One parent, with two or more relationships to child objects.
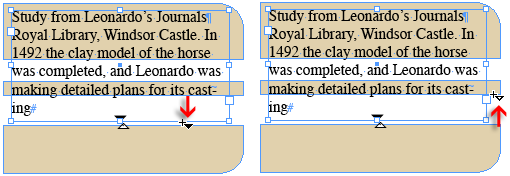
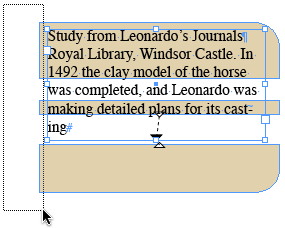
We need to ensure that the middle shape grows as the text frame grows. Select the AutoFit tool and click teh bottom of the text frame to set the parent control point, then click the bottom of the middle box, to set the child-control point.
Moving the frame down now results in the middle frame growing.
Distribute Spacing
Time to close the gap between the three beige background boxes. With the Selection tool click and drag a marquee around the edge of the three objects.
This will select the three objects, display the Align panel and enable the Use Spacing value and set the value to ‘0‘. Ensure the Alignment Location option is set to Align to Selection. Note that this feature is not available in InDesign CS2 or earlier.
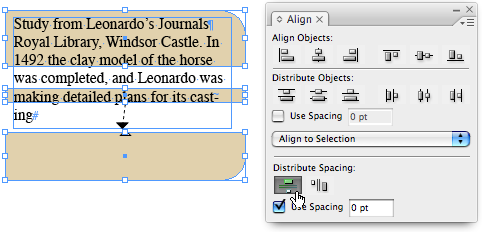
Click the Distribute vertical space button, to close the gaps between the three selected objects.
Applying text formatting
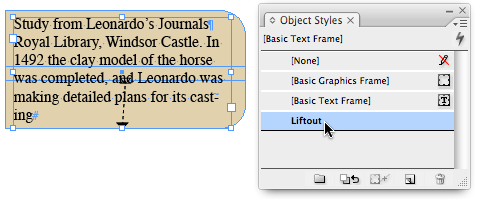
To automatically apply the text formatting, I’ve created an Object Style called “Liftout”. All this style does is apply the Paragraph Style with Next Style, no other settings are enabled.
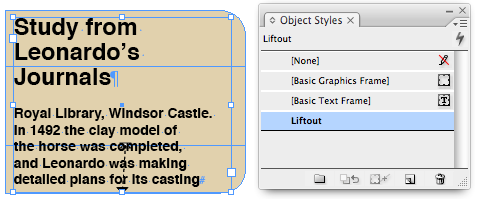
After applying the Liftout object style the first paragraph is automatically formatted with the “Heading” paragraph style and the next paragraph is automatically formatted using the “Body Text” style
More relationships
The example above – as mentioned earlier – is a one-to-two relationship. The text frame as the parent has a relationship with two other objects that move/resize as the text frame resizes.

To build on to this you can add more relationships, such as one between the text frame and a line… The video I recorded will show you how to do that 🙂
Video Tutorial
Leave a Reply